Showing posts with label bunting. Show all posts

Thursday, 23 October 2014

How to throw a Tiki wedding in VEGAS!!!

I was over the moon for my little brother Sam when he announced he was marrying the amazing Zara and the fact that they wanted to do it in Vegas was the icing on the cake!

Of course I offered to help in any way I could, especially when it came to the wedding decorations and I'm going to share with you my 5 simple steps to turning any party into a Tiki celebration to remember!


1. Burlap Bunting

I love burlap material as I think it gives a really vintage feel to your decorations, however this time I was looking for a distressed look so made sure I left it a little rough around the edges.

I tried out 2 new styles inspired by my travels to Hawaii (but mostly Pinterest)

White Distressed


Cutting out triangles from my burlap material, I made sure I had enough for the words "Just Married" and made a few extra to split up the words.

I used my Cricut to cut out letters/images on vinyl and stuck them onto the triangles but if you don't have a Cricut you could cut the vinyl with a craft knife or just cut up masking tape.

Then I coated the top of the bunting in white fabric paint. Don't worry about being to precise with this step as you want it to look a little distressed but make sure you go up to the edges so it doesn't fray too much.

Once dried, just peel back the letters and then stitch some  twine to the back of your triangles so you can string up your bunting

Personalised Screen Printing

Again I cracked out my Cricut and designed 3 bunting images. This time I personalised them for my brother's wedding by making a Z & S monogram for them both.

Instead of triangles for this one, I cut out large rectangles and then frayed round the edges. To make sure it didn't come apart completely I used some fray stopper which once dried, I was ready to go.

This time when I cut my designs out I had to remember to flip them backwards first as I wanted to practice my screen printing skills.

Taking the cut out vinyl, I stuck it to the outside of my screen and covered any gaps round the edge with masking tape.

Then I put a rectangle under my screen, positioning it toward the bottom of the screen and then pulled the ink over the top until I felt the image was fully covered. Lifting the screen up it relieved the image on the rectangle with a large gap up at the top - NOT TO FEAR there is method behind my madness. The reason for this is so that I can fold it over the twine and then sew on with my sewing machine. Of course remember to leave your bunting flags to dry before stitching them all together


2. Tiki Photo booth

Every wedding should have a photo booth. They are my favourite part about a wedding and a brilliant wedding favour for your friends and family to take away.

This is such a simple way of creating a bit of a buzz at your party.

I made the background by buying lots of 2m pieces of ribbon from Ebay, which were all different widths, and then sewing them all to a 2m piece of ribbon along the top - SIMPLE

Then I made a tiki blackboard with a piece of MDF covered in blackboard vinyl and then glued bamboo round the edges, before sticking a paper flower at the top. This allowed the guest to write their own special message to the happy couple or just something really funny

To finish it all off I bought lots of tiki tat as everyone loves a bit of cheesiness and dressing up for a photo. Stanley the Flamingo was a definite hit of the night

Now you can just let your guests take their own photos but I have my own digital polaroid where you can take picture but choose which ones you want to print out instantly. People love to get their polariod to take home and I've used it for so many parties now that it's definitely been worth it's money


3. Pompom Bunting

It took me a long time to come up with a colourful way to do some tiki bunting but when i saw this pompom tutorial inspiration smacked me in the face


I bought 5 different coloured balls of £1 wool from poundland and made 15 pompoms in each colours. Then i got a large sewing needle and threaded a long piece of wool through each of the pompoms to make a string of bunting.

Once finished I wrapped it round a piece of cardboard so that it didn't get tangled up when packed in my suitcase, then on the day all i had to do was slowly unravel whilst stringing it up on tress and the outdoor bar


4. Beer Koozies

Our wedding guests had their party Polaroids to take home but I also wanted to create something that people could use on the day - hence the beer koozies.

Now at the time, I knew exactly what I wanted to make but had no idea what it was called so after lots of Googling I found out it was a Koozie I was after, also known as a beer/stubbie holder.

I used my Cricut to cut out the template on foam and then stencilled the personalised wedding design on the front of the koozie, before stitching up both sides. I'll put up my templates on this blog in the coming weeks so that you can make them as well


5. Pool Lights

I did lots of research on floating candle holders but the cost of them didn't really stand up to the fact that we would only be using them for one night as I don't have the luxury of a pool at home so I came up with the idea of using glow sticks.

Originally we had planned to put the glow sticks in balloons and have them floating on the pool, which worked really great in my bath where I could turn off all the lights but because there were other lights outdoors they didn't really shine through the balloons. Instead we ending up putting the glow sticks in the bottom of the pool and leaving the balloons to float on the top. The pack of glow sticks I bought also had connectors to make a glow stick ball which was lots of fun


Just remember to take everything out the pool before you get out so it doesn't get stuck in the filter!

I hope these ideas have sparked your creative streak and if you decide to throw a tiki party of your own, then you have as much fun as we did!


Sam & Zara - I am so proud of you both. 
You have grown up to be amazing people and you are both so brave to carry on your life together over the other side of the world, even though I selfishly want you back home with us. I wish you all the happiness for the future & hope every day is better than the last.


I'll be back,


Wednesday, 6 August 2014

How to Craft the Perfect Hen Weekend!!!

When one of my best friends in the world asked me to be her bridesmaid, I knew I had to throw her a hen party she would never forget. Now Tatum has some pretty wicked hostessing skills so it was quite a daunting task but myself and her other bridesmaid put our thinking caps on and organised a weekend of vintage fun!


Tatum was extremely trusting in us and let us keep the whole thing a surprise from her. There aren't many people who would let their two mental mates organise a weekend to remember without knowing the details but there are a few things you need to remember to tell the bride and I'll cover those as we go!

Who's Invited

Now the first thing I wanted to do was get designing the invite but before you can start on this you need to know who you are inviting an a rough plan of action.

We let the bride tell us who she would like to invite and asked for contact details for each of the hens (it's handy to have an email address and mobile number) 

You also need to find out if she is wanting to split the party at all, e.g. just close friends for a party at night and then all family and friends during the day...

Coming up with a Plan

Now this is the tricky part - when you have so many options available to you, how do you possibly decide where to go and what to do!

We came up with our location based on the group of hens invited. Most of the hens stay in London or close by and a few of them had young children so we didn't want to go far away as it meant they probably wouldn't be able to join us - so with all the things London had to offer we decided this was our best option.

We then emailed all the hens telling them the Hen Weekend would be in London and gave them a choice of two dates (which we had already cleared with the bride). We picked the date that most hens could make and then asked the others if there was anything they could do to wiggle plans around so that they could make it as well. In retrospect it is much easier to pick one date but if people come back saying no then it could be a lot of emailing back and forward to find another date. I would recommend getting the dates sorted at least 3 months in advance so you have plenty of time to sort final plans.

Then it's time to Google it up to the max and search for those perfect plans! We created a SECRET Pinterest board (the secret part is really important as you don't want the bride seeing it) and that way both bridesmaid could start planning possible ideas and then we Skyped to discuss everything we had come up with. Of course, if you live next to each other then why not meet up over a G&T to discuss and have some pre-hen night fun of your own!

Remember to think about what your bride would want, rather than yourself and also something that won't push all of your hens too far out their comfort zone!


We decided the best way to do it was split the weekend into 3 parts so that way if you could only make part of the weekend then you didn't need to pay for the whole thing. So we came up with a plan for Saturday afternoon, Saturday night and Sunday afternoon. We also came up with a theme for each part as if you have a theme it's easier to come up with something to make your hens all look like they are out at a party together, rather than just a normal night out at a club.

As well as coming up with a plan you need to work out the rough cost for each part of the day. Now at this point you don't know who can attend each part so we gave a rough range - the lower price was if everyone came and the higher price was if half the group came. Remember to explain to people what is not covered in the cost you are quoting, e.g. booze in the club

And last but not least you need to give people an option for somewhere to stay. We booked an apartment for 4 people in the centre of town as it was free cancellation right up to two days before - that way we knew we had somewhere guaranteed but if we ended up having loads of people who wanted to stay then we could book somewhere bigger! As it turns out only 4 people wanted to stay but 7 people ended up not wanting to go home at the end of the night so remind people if they have to leave to get last trains etc they will miss the end of the evening!

The Invites

To make the invites I used a website called pic monkey. It has loads of backgrounds, cool shapes and funky fonts so you can knock up an invite in no time at all. 

I made a separate invite for each part of the weekend as they all had different themes but if you are sticking with the same theme then it's only down to how much information you can fit on the page!


Now normally you would post an invite out but I've always found a better way to do things for a hen weekend if to create a Facebook group (again please make sure it is SECRET so the bride doesn't see) and I then uploaded the invites as photos on the page. Now the only problem with this is you need to have all the hens as Facebook friends and it can be tricky to find them but if they are all friends with the bride already then you can search on her friends list - or send them a link to your Facebook profile page and get them to add you. Then once they become your friend you can send them an invite to your group page that you've created. A Facebook group is also great for asking your hens questions, like "does anyone have a food allergy" or "what's your favourite booze" and you can check how many people have seen your message which is handy if you have to chase people.


The Themes and What I Crafted for Them

Saturday Afternoon - Vintage 50s Housewife

We knew that the bride loves a bit of vintage so we thought we would start the day with a 50s housewife theme and that way we could make lots of housewife jokes and games as well.

We booked a canal boat called the Jenny Wren as they said we could bring our own food, booze and decorations which made it a good option to combine the price for lunch and a bit of fun for everyone at the same time.


Now the best advice I can give you is to find out what all your bridesmaid strengths are an play to those. The other bridesmaid Lindy is an amazing cook and great fun so she made all the food and organised the games. Where as I'm addicted to crafts and love spreadsheet so I made the decorations and pulled together the logistics of how it was going to work, who was coming to what and sorting out money.

I'll ask Lindy if she could share her wonderful recipes with us but in the mean time you are stuck with my crafts!

Bunting

Bunting is simple way to brighten up a room (or boat) and not to difficult to make.

  1. I cut a triangle out of cardboard and then used that to stencil it onto the material, which I bought on ebay (5 fat quarters made 4 meters of bunting). 
  2. Then take two triangles of the same material and lay them together so that the pattern side is in the middle. 
  3. Stitch them together using a sewing machine and then flip them inside out
  4. Take your ribbon, I got two from hobbycraft that said "congratulations" and "happily ever after", pinning your flags to the back of the ribbon and then stitch them on, removing the pins as you go
Put up some balloons as well to give it that extra festive feel!


Cupcake Stands

I love these and you can use them over and over again for events.
  1. buy your cupcake stand fittings - I got mine on ebay for a bargain
  2. search round charity shops (or ebay) for different sized vintage plates - I used 3 sized plates:
    • 1 dinner plate
    • 1 side plate
    • 2 saucers
  3. You will also need a drill and diamond drill piece. Make sure you buy one that will make large enough holes for your cake stand fittings
  4. Take your plates one buy one and drill a hole in the middle. Put a little bit of water on the plate/drill piece before you start and make sure the place you are drilling stays a little wet, to keep the drill cool. Also you will need to hold the drill at a slight angle to begin with and then once the hole has begun you can hold it more upright.
  5. Once you have cleaned your plates you can construct your tower:
    • Take one of the small saucers and place it upside down with the large dinner plate on top, then put the screw through both so its sticking up through the dinner plate
    • Screw in one of the stems and then put the side plate on top (remember to put the washer on either side to help protect the plates)
    • Screw in another stem and place your last saucer on top
    • Screw in the top handle and you are done
You could even drill a hole in a tea cup and add that to the top before screwing in the handle!


Other Decorations

There are lots of other bits and pieces you need to get to make your table look pretty
  • table cloths
  • napkins
  • plates
  • cups
  • cutlery
  • fun times like mini windmills and cocktail umbrellas


Hen Goodie Bags

It's lovely to have a little gift for all then hens and bride to take home with them as a memento of the weekend so a little hen goodie bag is a great idea


How to make the bag
I have done these before with gift bags but that's only good if you are not going to be out and about all day. This time I thought I would try shopping tote bags as it would give people somewhere to put there bits and pieces in during the day
  1. I bought a pack of canvas bags on ebay
  2. Make a stencil using sticky back vinyl. I used my Cricut machine to cut it out but you can use a craft knife as well.
  3. Stick the stencil onto the from of your bag
  4. Colour it in with fabric paint or a fabric pen (fabric sharpie pens work well). Make sure you put a piece of cardboard or something inside the bag so it doesn't go through to the other side
What to fill it with
  • Sunglasses - We wanted something all the hens could wear so we thought these vintage sunglasses would be a fun piece to add. We got the bride white ones so she stood out a bit more
  • badges - these personalised badges are fab and a great memento for your hens. Also they came amazingly quick - this shop is the best
  • bubbles - these are always fun at a party and I managed to find diamond ones which matched our brides surname
  • Sweets - there will be some point over the weekend when someone gets the munchies so a little sweetie bag is always a handy thing to have.
  • Details of the weekend plan - I made everyone a lanyard with the laminated invites and a little game for us all to play. Once we got off the boat we split into teams and all ran round Camden taking pictures of things that would help Tatum be the "perfect" housewife - the funnier the better

  • last but not least, I engraved a compact mirror for everyone

How to engrave a mirror

  1. Buy your compacts, some etching cream and sticky back vinyl
  2. Again I used my Cricut machine to cut out the words I wanted to put on the mirror
  3. Stick the vinyl to the mirror - making sure there are no air bubbles or bits sticking up
  4. use a small paint brush to put your etching cream on top of the stencil
  5. Leave for 10-15mins (don't think it takes this long but I like to make sure) and then wash it off when it's finished
  6. Take the sticker of and give it one final rince - then leave it to dry


I found everything I needed on amazon and ebay so you don't even need to leave your house to get them but remember it will take a while to get things delivered and then you still need to make them so give yourself plenty of time.

Saturday Night - 1920s Party

We decided we wanted to do the next part in our apartment and then head out to a club but you can hire a cottage for the weekend and organise the whole party in there - we have some great ones in Scotland!!

Now you might be wondering why we didn't keep the same theme all day but 50s dresses are really hot with those underskirts and we didn't want people feeling roasting in the club so we asked everyone to wear a little black dress at night. The 1920's theme was a surprise to everyone and I had a crafty way to transform their outfits into 20s stunningness

1920s Headband Making

I searched online and found pictures of 1920s headbands that I thought wouldn't be too difficult to make, and then I made an inspiration board for the hens to use on the night.


I bought along lost of props:
  • glue gun
  • scissors
  • needle and thread
  • elastic lace
  • black felt
  • feathers
  • flat backed jewels and pearls - different sizes
Here are the instructions I gave the hens on making their head bands:
  1. Hold the elastic around your head, stretching it a little bit and cut it with a slight overlap
  2. Sew the ends together and then put the headband to one side
  3. Cut out a basic shape from the felt and cover it in jewels on the front, with a few feathers glued to the back
  4. Then take your basic shape and add a thick line of glue all the way along the back before sticking your headband to it. Make sure you stick the piece of your headband that has the stitching to hide it
There was too many hens to do everyones at the same time so the other bridesmaid played games with everyone while I manned the craft table and took a few people at a time

I also bought everyone a long set of 72inch flapper beads to finish off the look


You may notice the bride is wearing a hand made sash, if you would like one then contact me on craftalavista@gmail.com and we can discuss the best option to make it personalised to your bride.


Party Decorations

I found lots of 20s posters on Google and printed them out on A3 as well as putting up balloons. To finish it off I made some art deco bunting with my Cricut  - I'll put up the template for it soon!


And what did you do next...

I hear you asking what club we ended up going to - Bar Soho in Covent Garden is a fab dance club where we managed to get our own area that had a massive vintage style bed in it - perfect for photos and our own dancing space!


Sunday Afternoon - Commitment

We started of the Sunday but having a chilled out picnic in a local park so that everyone could recover. remember you might have a few hungover ladies on the second day so don't book anything too adventurous!!

Then our big surprise was - as Tatum was making a commitment to her husband to be, we took her to see The Commitments Musical


This is the perfect musical for a hen weekend - nothing to serious and lots of singing and dancing to be had! They even did an encore at the end when the cast just came out and played a few songs like you were watching a live band! AMAZING!

So I hope this has given you inspiration for planning your hen weekend and remember the most important thing is it's not how expensive you make it and all about those little personalised touches that everyone will remember - especially your wonderful bride to be!

I'll be back,


Thursday, 24 April 2014

Printed Loveheart Bunting

I love lovehearts, so when I got my Cricut Machine and saw this design for this heart I knew I had to make something from it.

This tutorial will take you through the template you need, how to make the lino stamp and also how to create the bunting so its a bargain 3 for 1 tutorial!!! 


What you need:

Cricut Machine & Folk Arts Festival template (or craft knife if  you don't have a cricut)
Sticky vinyl
Lino
Lino cutting tool
Super glue
Off cut of wood
Black ink
Small sheet of glass (I used a photo frame)
Rolling pin
Lino brayer roller
Linen
Hessian
Sewing Machine

Step 1 - Cut out your template

Using the online Cricut cutting room you can either create your own template or purchase ready made ones. I bought the folksy one as it has a really lovely font and lots of cute images. I loaded up my black vinyl on the cutting board and set it to the vinyl recommended settings.


Depending on how old your cricut mat is, might mean that the picture starts pealing away while it's cutting - this won't cause an issue unless a lifted piece catches the cutting knife and starts dragging it around. If this happens be ready to press stop on your computer screen quickly.

Step 2 - Cut your lino stamp

I then took my cut out vinyl design and placed it on top of a piece of cutting lino, after peeling the protective backing off. Once your sticker is stuck to the lino you can begin to cut it using your lino cutting tools (For those in Scotland, I learned how to do this at Edinburgh contemporary crafts). Once finished, your just remove the vinyl and your stamp is ready to go. 


Step 3 - Mounting your stamp (optional)

As an extra step I mounted my stamp on a block of wood with super glue so that when I was rolling ink on it I knew it was always on a flat surface and off of the floor/table. This is a step you don't need if you have a protective surface under your stamp.


Step 4 - Cut out your bunting

Take your Linen material and cut out a flag shape, which is big enough to fit your stamp. Then take the Hessian material and cut the same flag shape but slightly larger so that it acts as a border. Leave a slightly larger border at the top so you can fold it over later

Repeat this step until you are happy with the length of your bunting


Step 5 - Stamp your image

Put a little ink onto your glass - I used an old photo frame I had lying around. Then take your Lino brayer roller and roll it in the ink before rolling it across the top of your stamp.

Place the linen material on top and then roll on top of it with a rolling pin or glass for an even finish.

Step 6 - Sew your bunting flags

Pin your linen flags to your larger Hessian counterparts and then sew round the edge of each pair to attach them together. Remember to leave that larger border gap at the top!


Step 7 - Create bunting

Turn your flags over and one but one start dewing them to your twine. To do this I placed the twine near the top of the flag before folding it over on top of the twine and then sew the material in place.


Step 8 - Hang your bunting

Happily hang your bunting for everyone to admire and be dead chuffed with yourself! I know I was :)


I'll be back,


Tuesday, 22 October 2013

Wallpaper Bunting

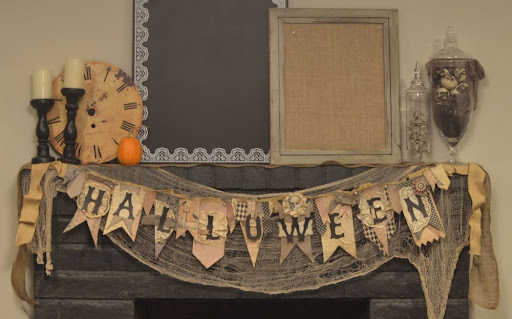
So you have maxed out your Halloween budget on your costume and you still have to decorate your house before your friends turn up. This tutorial will show you how to make a really cheap and simple bunting that you can jazz up your living room for any occasion!!


Materials

  • wallpaper samples (you can pick these up for free at any DIY store)
  • scrap of cardboard (but you can use a piece of wallpaper if you don't have any)
  • twine or ribbon
  • double sided tape
  • pencil
  • scissors

Step 1 - Make your template

Draw your design on your scrap of cardboard. I use a diamond kind of shape so that you can fold the top over the twine. Carefully cut out your template and put it to one side.


Step 2 - Draw your flags

Unroll your wall paper and place your template on the underside. Draw round your template and repeat the process until you can't fit any more on your piece of wallpaper


Step 3 - Cut out your flags

 Then cut out each of the flags and separate them into piles of the same design. Mine were a bit curly from the wallpaper being rolled so I lay books on top of them for a while to flatten them.


 Step 4 - Add flags to your twine

Taking 1 flag at a time, place a piece of double sided tap just under the largest part of the flag, then place your twine on top, before folding the flag over the twine. Repeat the process until you get your desired length.


Step 5 - Hang your bunting

it really is that simple - all that's left is to hang your bunting for your friends to admire. The best bit is you can easily remove the flags and reuse the twine for new bunting to match your next occasion.


About This Blog

About This Blog
A blog for fun and unusual Craft tutorials This year I will be learning a new craft every month - if there is a craft you would like to learn, let me know

Search This Blog

Featured Post Via Labels

Instagram Photo Gallery