Showing posts with label tutorial. Show all posts

Tuesday, 2 February 2016

Fluffy Wall Clouds with Teddy Bear Pockets


I wanted to incorporate clouds on my daughters wall so that the blue looked more like a cartoon sky, but I had to think hard about how to do this, as I didn't want anything that was going to be a pain to paint over when my daughter decides she wants skulls and crossbones instead. 

I knew it had to be
  • Something tactile for her to touch, helping with those baby sensory skills 
  • Easy to pull off the wall at a later date
  • Washable (well at least wipeable) if she gets mucky hand prints on it

and this design meets all those aspects so I think its a winner.


Before I start, this is just one tutorial in a range that will help you make a whole woodland nursery so if you would like to see the others then click on the image below

click here to create your own woodland nursery

What you will need:

  • White Felt
  • Toy/Cushion Stuffing
  • Chalk
  • A couple of different sized circles (I used mugs)
  • Needle and Thread
  • Scissors
  • Sewing Machine
  • Command Strips


Step 1 - Create your Cloud Shape

Taking your felt and making sure it is folded in half, draw on your clouds with chalk. I used mugs to get the curves but you could draw it free hand


Then pin the material together (remember that it should be folded in half) so when you cut out the cloud, you have two the same size


I also cut out a circle and then took the top off it to make a pocket shape for the teddy.

Step 2 - Add the Command Strips

Unpin your cloud shape and take the side of the cloud that has the chalk on it, sewing half of a command strip on it, so the Velcro side is facing out (the other other part of the command strip will go on your wall). I used 1 strip for smaller clouds and 2 for bigger ones. They are light enough that 1 command strip should be fine but I wanted to make sure they sat flush against the wall by placing one at either side.


Take the other side of your cloud, that doesn't have a command strip and sew your pocket on, using your sewing machine. 

NOTE: Make sure when you put the cloud sides together that they line up with the pocket and the command strips both being on the outside. You don't want to end up wit the pocket accidentally being on the inside of the cloud.

Step 3 - Sew the Cloud Together

Pin the two sides of the cloud again and then sew around the edges, leaving a gap big enough to put the stuffing in.

Normally when sewing a cushion you should sew it inside out and then flip it out so that the seams are on the inside but I found it made a better shape with the seam outside and less hassle, therefore yours command strip and pocket should be facing out the way when sewing.


Step 4 - Fill it Up

Fill the cloud with stuffing, making sure you get into all the bumps. You don't need to put a lot in, just enough so that the cloud looks puffy.


You can then sew your cloud closed. You might wish to do this by hand but I found it easier to finish it up with my machine. I moved the stuffing into the middle as I stitched and then flattened it back out once finished.


Step 5 - Add your Teddy and get it on the wall!

What cloud would be complete without a teddy. My daughters have mine and my partner's childhood teddies as long as the first one we put in her cot, so that its a nice way to show off her extra special ones.


Then put the backs on the command strips so the Velcro sticks together. Following the instructions of your strips, remove the backing paper and push the cloud against the wall holding it on firmly for 1 minute.


And there you have it - fluffy wall clouds that are a cute storage idea. Hope you have fun adding a bit of 3D fluffiness to your room!

 I'll be back,

Saturday, 9 January 2016

Patchwork Woodland Tree Decal


I spent ages thinking about how I could make a tree on the wall for my little girls room. I've painted murals before and also thought about making one out of cardboard but when I found out you could stick material to the wall using cornflour - I was sold! My daughter loves looking at all the patterns on the leaves and the owl perched in the middle so I'm glad I made my own, rather than buying an expensive decal.

Before I start, this is just one tutorial in a range that will help you make a whole woodland nursery so if you would like to see the others then click on the image below

click here to create your own woodland nursery

What you will need:

  • Thin brown material - I used linen
  • Different coloured material for the leaves. I bought some fat quarters as it was a cheaper way to get a few different patterns
  • Cornflour

Knot in tree for owl (optional)

  • Same brown material as above
  • Oval or round plastic container ( you could make it out of cardboard as well)
  • Wadding
  • Cardboard
  • Glue gun
  • Drill & screw

Step 1 - Make your paste

Mix a cup of cornflour with boiling water until you get a thick wallpaper paste consistency and then leave it to cool to room temperature. 

I didn't do this before I started and then was frustrated that I had to wait for it to cool so please remember to do it first!!!


Step 2 - Carve out your tree trunk

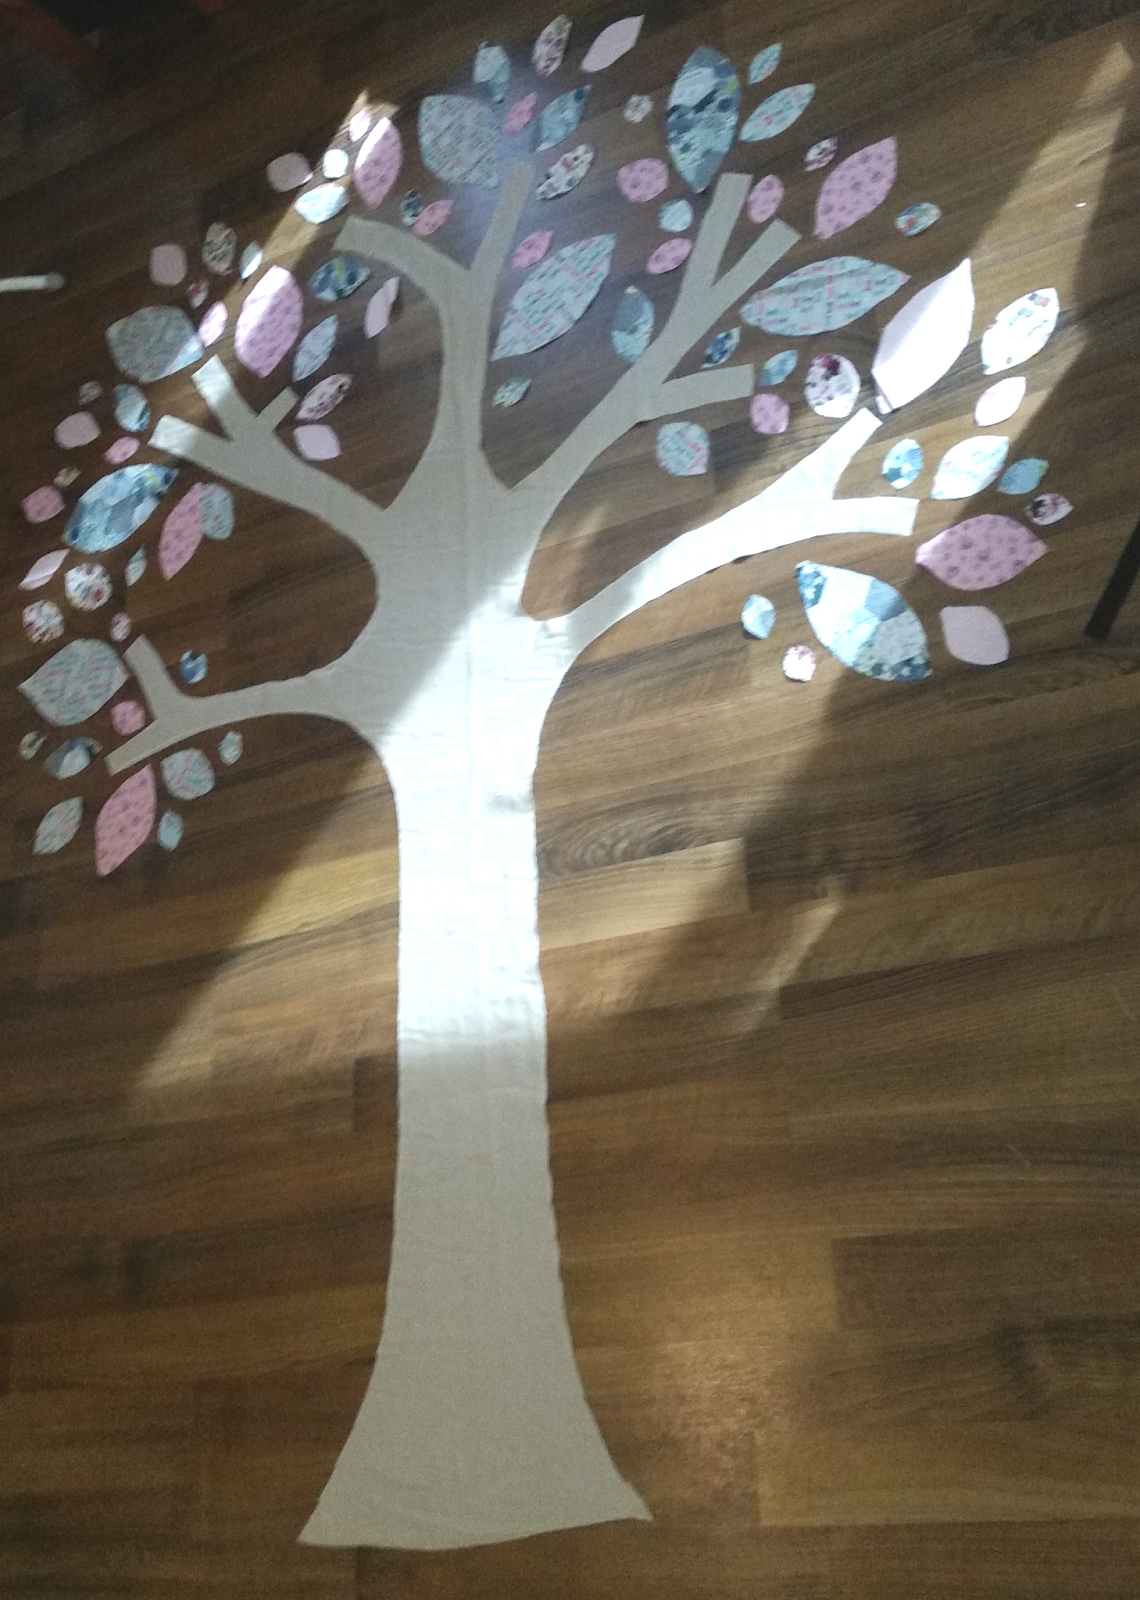
I bought 2 meters of brown linen and then just cut my design out freehand, although we may want to draw your design on the material before you start.


Step 3 - Cut out your leaves

Cut out leave shapes from your patterned material, trying to do different sizes with the same colour so it looks more realistic. I arranged mine round the trunk on the floor as I was going, so I could see how many I needed.

To save a bit of time you could layer up your material and cut a few leaves at the same time.


Step 4 - Paste the tree onto the wall

Now as you can see from the pictures below I brushed the paste onto the wall but this left a slight mark on the wall as it didn't dry completely clear so I would recommend applying the paste to your material, putting it on the wall and then brushing another layer of paster over the top of the material.

I'm not very good at cutting straight so I let the bottom of the tree flap over the skirting board and then once dry I cut it with a craft knife

Good news is that this paste does come away with a clean cloth and bit of warm water so I was able to wipe away some of the excess but be careful as this will lift some of your paint as well. you can also use this method to remove your decal once you no longer want it on your wall

I also put a sheet on the floor round the tree so that any paste dripped onto that, instead of the carpet


Step 5 - Making the knot (optional)

Cut a bit of cardboard that fits neatly inside your plastic container (it doesn't need the cross cut out inside, that was already on my piece of cardboard). If you don't want to use a plastic container then you could make an oval shape from a long strip of cardboard but it would be more flimsy over time.

Using the left over scraps of material from your tree trunk, cut a piece that is a bit bigger than your cardboard and you can either glue it down or do a drawstring stitch round the material and gather it all in, like I have. You can see once you turn it over, you have a backing for your tree knot which will cover any screws etc.


Then cut a piece of wadding that is double the hight of your container and glue it all the way around. Fold the wadding over the top of the container, gluing as you go and then repeat the process with more material from your tree trunk (making sure its slightly more than double the width of the container this time). You don't need to glue the material on the inside the container as your cardboard backing will hold it in place.


Place your tree knot on the wall and then screw it in place using a drill. Then making sure all the material is folded into the middle, insert the backing to hold it all in place and hide that screw.


Step 6 - Add your animal

My friend Tatum bought this gorgeous patchwork owl from Monsoon, which fitted perfectly in our tree but you could add in any woodland creature, or even have a go at making your own sock animal!


 I'll be back,


Monday, 19 October 2015

Fun Snacks for Kids


It can be difficult to get your little ones to choose a healthy snack over a sugary option but these butterfly snack bags will get them excited about fruit and veg, as well as being an easy way to transport food on a day out or for a kids party.

What you will need

sealable sandwich bag
peg
pipe cleaner
googly eyes
double sided tape
choice of snacks

Step 1 - Store your snack

Open your sandwich bag and put snacks into both bottom corners. Its up to you if you mix your snacks up or leave them separated on opposite sides like mine. Seal the sandwich bag, making sure you push out all the air out before you seal it, and then twist bag in the centre and put the peg over it.

Step 2 - Give your butterfly a face

Take your pipe cleaner and fold it in half then roll in the ends until it looks like the photo above. Then pinch it in the peg to give you the antenna. Finish off the face by stick your googly eyes on the front of the peg

Step 3 - Optional extra snack

I wanted to add a little something extra to my snack so using some double sided sticky tape I attached a mini cheese block to the back of the butterfly but you could use other sealed snacks like raisin boxes or yoghurt tubes.


Enjoy your snack and hopefully the 5 minutes of piece and quite you get while your child is eating.

I'll be back,


Sunday, 5 April 2015

Hand Print Flower Collage

This spring I was lucky enough to spend the start of spring with 4 lovely girls in the Bell Household and we set to work making this lovely piece of art! It really is super simple to make, even the 3 year old twins were able to get involved so keep your kids busy in the holidays and give it a go this Easter!


What you will need:

Canvas  - I got mine from The Works but you can get smaller ones in Poundland
Blue Tissue Paper (or whatever colour you want your background to be)
Green Card
Card to match your background colour
Glitter
PVA Glue (lots of it)
Scissors
Thick kids paint brushes

Step 1 - Get those hands messy

You'll need about 6 hand prints so split the hand prints between the number of children you have taking part.

Give each child a piece of card (the colour that will match your background) and then get them to put their hand prints on it. I did this by letting them put some paint on a paint brush and then colour in their hand before pressing it on the paper. I also let the kids pick their own coloured paint (which quickly backfired when they all copied each other but they were happy)

Put these hand prints to the side and leave them to dry

Step 2 - Create your Tissue Paper Collage

Start by asking the kids to tear the tissue paper up into lots of small pieces and make a pile in the middle of the table. This bit went down a treat but make sure it doesn't get crumbled into balls otherwise you will struggle with the next bit.

Clean a paint brush and use it to cover the canvas in a thin layer of PVA. Then start layering the tissue on top - you can either do all the same colour like us, or do a multicoloured collage.

Then put another thin layer of PVA over the top, as this will make the background shiny when the glue dries. Don''t worry if the tissue tears, you can always layer more tissue over the top.

Step 3 - Cut your stems

Take the green card and cut enough strips for your flowers. Then stick these strips in the centre of your canvas, grouped together at the bottom. You won't need any more glue if your canvas if still sticky but if it's already dried then just add a bit more to the back of the stems.

Step 4 - Let the flowers bloom

Take the hand prints you made earlier and cut around them before sticking them on the top of each of the stems

Step 5 - Plant your flowers

Cut a spare piece of card to the shape of a plant pot and then cover in it PVA glue. take your glitter and shake across the top to cover

Top Tip - lay another piece of card under your plant pot of that you catch the excess glitter and then can gently fold the card to funnel it back into the glitter pot

Finish your picture by gluing the pot over the bottom of your stems and that's you done! 


Told you it was easy and it's a great way to show off not only your kids art skills but their hand prints as well, rather than one of those generic kits you can by in the shops!!!!

I'll be back,


Monday, 16 February 2015

52 reasons why I love him...


My boyfriend and I have been together for 12 years and this year I wanted to make him a valentines gift that showed him how much I loved him...52 reasons to be precise!


What You Need:

pack of cards
2 sheets of 12x12 of sturdy paper/thin card (or 4 A4 sheets)
pen or printer
scissors or a cutting machine
ring-binder
hole punch
string/twine
PVA glue

Step 1 - Record your reasons

It took a wee while for me to get started but one I started writing things down it was easy to come up with my reasons of love. I tried to keep a mix of funny and serious (as my boyfriend is all about the jokes), taking inspiration from
  • their quirks
  • things they bring out in you
  • physical attraction
  • in jokes
  • things they do for others
I used Wunderlist to keep track of my list as you can download the app on your phone and access online so whenever I got a spark of inspiration, I could add it to my list.

Step 2 - Print/write them down

I have a Cricut Explore which is what I used to cut out my cards and write on them but if you don't have one you can always print them out on your computer or just handwrite. 
I cut my pieces of card to 1.5" x 2.5" as this fitted pretty well on the playing cards and it you are using your Cricut, then make sure you attach the text to the rectangle images before cutting so that the text is aligned.

Step 3 - Punch those cards

This is a bit tricky as the hole punch is just smaller than your average pack of cards so you need to be pretty precise to make sure you don't cut over the edge of the card.

Step 4 - Bind your cards

Taking your ring-binder, cut/rip your rings out the middle. I used a pair of needle nose pliers to help push it off the card.
I then cut out a piece of the ring-binder card that was slightly bigger than the pack of cards to use as the background, hole punching it and then tying the rings onto it so they are secure.

Alternatively if you want a ring-binder front and back then you could just leave the rings in the binder and cut it so that the whole binder is just slightly larger than the deck of cards, like a mini hardback book

Step 5 - Glue in your love

Open up the rings and put all your playing cards in so that the backs of the cards are facing up. Then glue each of your reasons on the cards, using one of the jokers as the front page with your title on it. Careful not to glue your cards together though!!!!


I'll be back,


Wednesday, 3 December 2014

Christmas Champagne Glasses


What you will need

  • Champagne Flute (or any other glass you want to decorate)
  • Metallic coloured Sharpies (I found a pack with gold, silver, red & green in Ryman)
  • Christmas snowflake template & Printer
  • Masking tape

Instructions

Step 1 - Position your design

Before starting give your glass a wash and dry well - you don't want any greasy fingerprints ruining your design

Cut out the text / image you want to use and stick it in place on the inside of your glass using masking tape. 

I tried two designs (both are on the template supplied):
  • All I want for Christmas is bubbles
  • You're my snowflake
or you could try your own idea. I quite like the thought of using them as place setting on your Christmas table and come up with a personalised glass for everyone.


Step 2 - Draw your design

Holding your glass, draw over the top of the template with a Sharpie pen on the outside of your glass. You can also add on any extras you want to draw freehand, like these cute little bubble. I did this one line at a time, keeping the dots close at the bottom and further apart as I worked my way up.


Step 3 - Finishing Touches

I fancied a snowflake design on the base of my glass to add a little bit of extra glitz. This part was really simple as I just places the snowflake image under the glass and then draw the design over the top, adding some extra shapes round the edge.


Step 4 - Go get a drink

After all that crafting it would be rude not to test them out! Just make sure you hand wash them and dry carefully but the Sharpie should stay on pretty well


I'll be back,

Monday, 1 December 2014

Paper Cut Christmas Gift Tags


I try to find a new way to wrap my Christmas presents every year and this year I has a new toy to play with - my Cricut Explore

Since it's the season of giving gifts I thought I would share my SVG file with you and instructions on how to add the lettering - hope you guys enjoy using it


Step 1 - Download the SVG file

Click on the image below and down load my christmas.svg file


Step 2 - Upload SVG to Cricut Design Space

Upload the christmas.svg file buy selecting the vector upload option and then choose the image to import


Step 3 - Add your text

Add text to your image


Turn it black and then move it so that the centre is touching to one of the lines on the line.
Once it is touching the line, ungroup the text


When the text is ungrouped you can move the letters individually. This means you can slightly turn the text so that it an all be moved to touch the line on the image.


Once you've finished moving all the text on one line, select each of the letters and click on "group" so they are linked back together.

Then select both the sentence and the image, before clicking the Weld button to link the test to the image. Repeat until you have added text to all the lines.


Step 4 - Link your star

There will be a gap between your text on the top line and one of the falling stars so link it up by adding a square and move it until it fits between the bottom of the letter and the star. Remember to weld the square to the image so that it stays in place when cutting.


Step 5 - cut out the image

Cutting out these tags with my Explore, I then glued them to the front of  my gifts, finishing it of by writing the recipients name on the tree with a gold pen.


I'll be back,


Sunday, 30 November 2014

Paint Swatch Christmas Cards


This is a great one to do with the kids, especially when they are school age and need to take loads in for their friends / teachers!!

What you need

  • Paint swatches (I picked mine up from Homebase but most DIY/paint stores have them)
  • Blank cards or sheets of card folded
  • Christmas Text 
  • Buttons
  • Sequins
  • PVA glue

Instructions


Step 1 - Select your swatches

I walked into Homebase and had so much choice that my Christmas trees were almost purple but in the end I stuck with green and brown. However, if you want to be more adventurous and give everyone a different coloured tree, then go for it!

If you can't get your hands on any then coloured card will do the same job.


Step 2 - Cut out your tree

Cut a triangle from your swatch. I ended up having to cut this tree in half as it was too long for my card but you can adjust this to whatever works for you. I like a range of different sizes so they don't all look the same.


Step 3 - Plant your tree

With a few dabs of glue on the back of your tree, stick it to the front of your card. I used a ready made pack of blank cards I already had in the house but you can just buy sheets of card and fold/cut them to the size of your choice.

I also cut a small piece of the brown paint swatch to use as the base of the tree, also gluing it onto the card.


Step 4 - Add sparkle

For some reason I also had a tub of sequins in the flat that had snowflakes and stars (as well as some dinosaurs and cats mixed in - don't ask) so I was able to glue a few of these around the tree to add a bit of sparkle. Circle sequins or sticky gold stars will have the same effect though.


Step 5 - Add your Christmas Message

Print out your Christmas message. I've attached a sheet full of Merry Christmas labels for you to use but feel free to come up with your own.

Glue this onto the bottom of your card and then a button on either side or use more sequins / stars to finish it off.


I'll be back,

About This Blog

About This Blog
A blog for fun and unusual Craft tutorials This year I will be learning a new craft every month - if there is a craft you would like to learn, let me know

Search This Blog

Featured Post Via Labels

Instagram Photo Gallery