Showing posts with label tree. Show all posts

Saturday, 9 January 2016

Patchwork Woodland Tree Decal


I spent ages thinking about how I could make a tree on the wall for my little girls room. I've painted murals before and also thought about making one out of cardboard but when I found out you could stick material to the wall using cornflour - I was sold! My daughter loves looking at all the patterns on the leaves and the owl perched in the middle so I'm glad I made my own, rather than buying an expensive decal.

Before I start, this is just one tutorial in a range that will help you make a whole woodland nursery so if you would like to see the others then click on the image below

click here to create your own woodland nursery

What you will need:

  • Thin brown material - I used linen
  • Different coloured material for the leaves. I bought some fat quarters as it was a cheaper way to get a few different patterns
  • Cornflour

Knot in tree for owl (optional)

  • Same brown material as above
  • Oval or round plastic container ( you could make it out of cardboard as well)
  • Wadding
  • Cardboard
  • Glue gun
  • Drill & screw

Step 1 - Make your paste

Mix a cup of cornflour with boiling water until you get a thick wallpaper paste consistency and then leave it to cool to room temperature. 

I didn't do this before I started and then was frustrated that I had to wait for it to cool so please remember to do it first!!!


Step 2 - Carve out your tree trunk

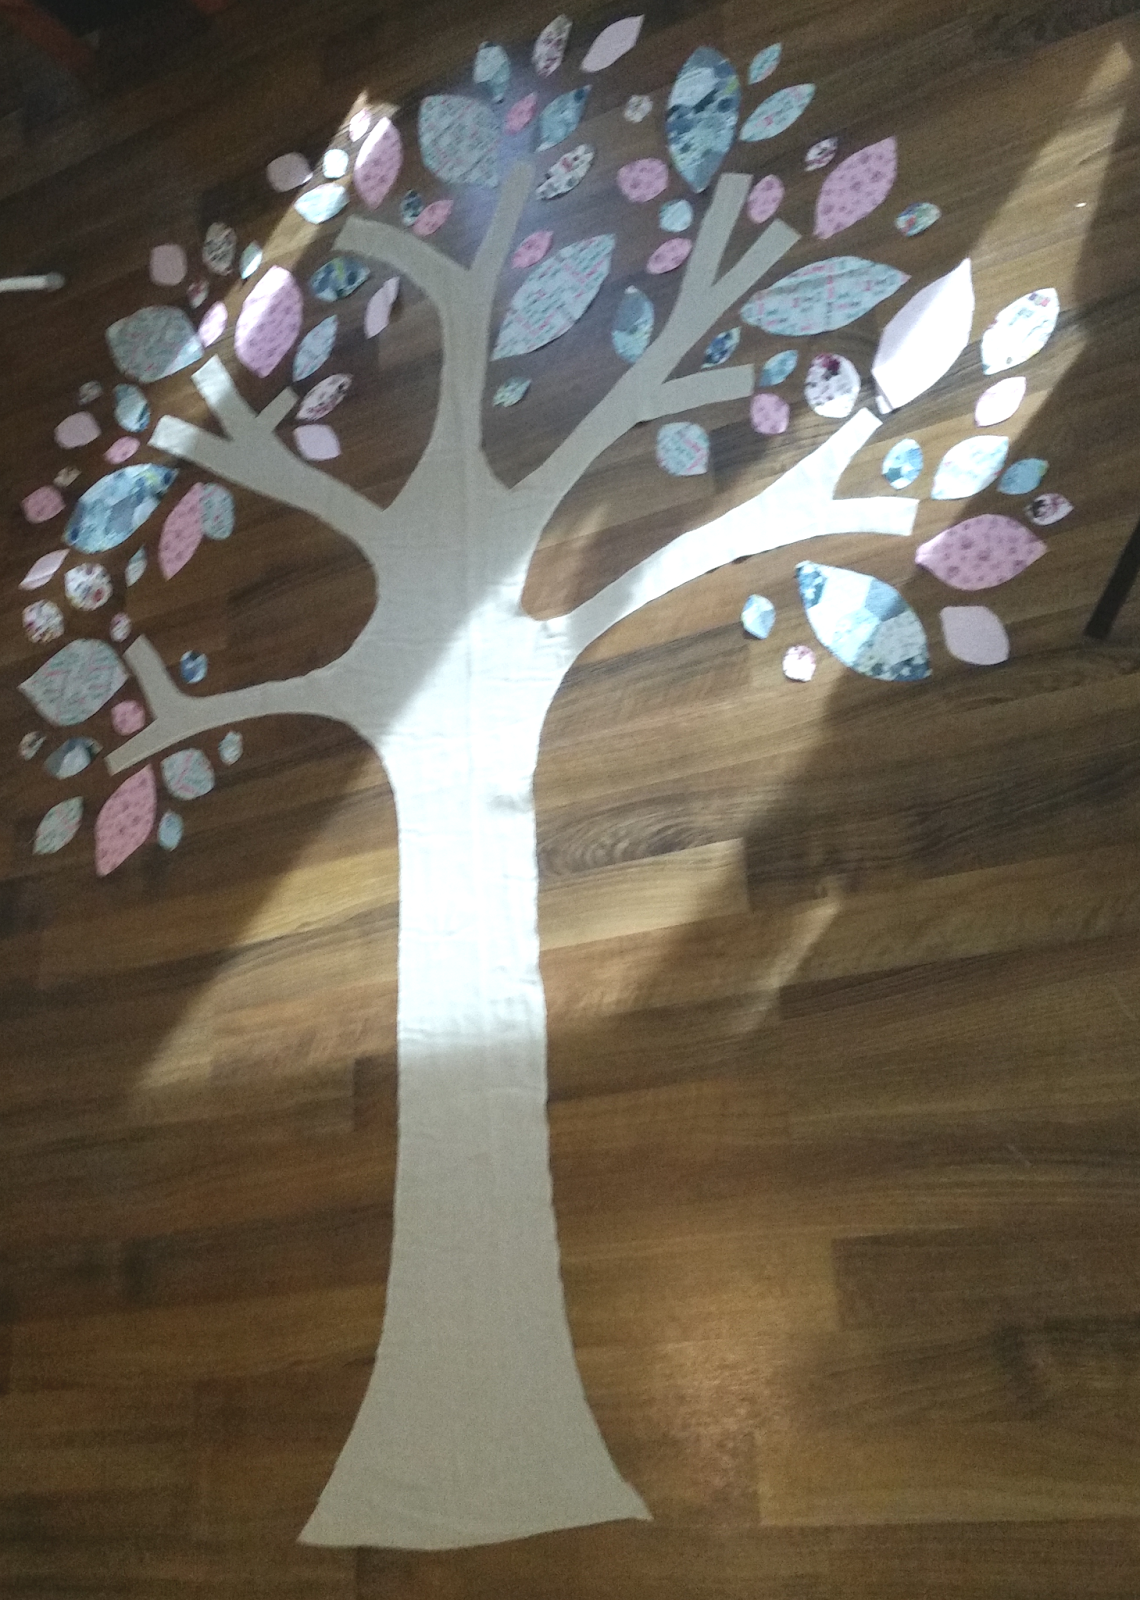
I bought 2 meters of brown linen and then just cut my design out freehand, although we may want to draw your design on the material before you start.


Step 3 - Cut out your leaves

Cut out leave shapes from your patterned material, trying to do different sizes with the same colour so it looks more realistic. I arranged mine round the trunk on the floor as I was going, so I could see how many I needed.

To save a bit of time you could layer up your material and cut a few leaves at the same time.


Step 4 - Paste the tree onto the wall

Now as you can see from the pictures below I brushed the paste onto the wall but this left a slight mark on the wall as it didn't dry completely clear so I would recommend applying the paste to your material, putting it on the wall and then brushing another layer of paster over the top of the material.

I'm not very good at cutting straight so I let the bottom of the tree flap over the skirting board and then once dry I cut it with a craft knife

Good news is that this paste does come away with a clean cloth and bit of warm water so I was able to wipe away some of the excess but be careful as this will lift some of your paint as well. you can also use this method to remove your decal once you no longer want it on your wall

I also put a sheet on the floor round the tree so that any paste dripped onto that, instead of the carpet


Step 5 - Making the knot (optional)

Cut a bit of cardboard that fits neatly inside your plastic container (it doesn't need the cross cut out inside, that was already on my piece of cardboard). If you don't want to use a plastic container then you could make an oval shape from a long strip of cardboard but it would be more flimsy over time.

Using the left over scraps of material from your tree trunk, cut a piece that is a bit bigger than your cardboard and you can either glue it down or do a drawstring stitch round the material and gather it all in, like I have. You can see once you turn it over, you have a backing for your tree knot which will cover any screws etc.


Then cut a piece of wadding that is double the hight of your container and glue it all the way around. Fold the wadding over the top of the container, gluing as you go and then repeat the process with more material from your tree trunk (making sure its slightly more than double the width of the container this time). You don't need to glue the material on the inside the container as your cardboard backing will hold it in place.


Place your tree knot on the wall and then screw it in place using a drill. Then making sure all the material is folded into the middle, insert the backing to hold it all in place and hide that screw.


Step 6 - Add your animal

My friend Tatum bought this gorgeous patchwork owl from Monsoon, which fitted perfectly in our tree but you could add in any woodland creature, or even have a go at making your own sock animal!


 I'll be back,


Sunday, 30 November 2014

Paint Swatch Christmas Cards


This is a great one to do with the kids, especially when they are school age and need to take loads in for their friends / teachers!!

What you need

  • Paint swatches (I picked mine up from Homebase but most DIY/paint stores have them)
  • Blank cards or sheets of card folded
  • Christmas Text 
  • Buttons
  • Sequins
  • PVA glue

Instructions


Step 1 - Select your swatches

I walked into Homebase and had so much choice that my Christmas trees were almost purple but in the end I stuck with green and brown. However, if you want to be more adventurous and give everyone a different coloured tree, then go for it!

If you can't get your hands on any then coloured card will do the same job.


Step 2 - Cut out your tree

Cut a triangle from your swatch. I ended up having to cut this tree in half as it was too long for my card but you can adjust this to whatever works for you. I like a range of different sizes so they don't all look the same.


Step 3 - Plant your tree

With a few dabs of glue on the back of your tree, stick it to the front of your card. I used a ready made pack of blank cards I already had in the house but you can just buy sheets of card and fold/cut them to the size of your choice.

I also cut a small piece of the brown paint swatch to use as the base of the tree, also gluing it onto the card.


Step 4 - Add sparkle

For some reason I also had a tub of sequins in the flat that had snowflakes and stars (as well as some dinosaurs and cats mixed in - don't ask) so I was able to glue a few of these around the tree to add a bit of sparkle. Circle sequins or sticky gold stars will have the same effect though.


Step 5 - Add your Christmas Message

Print out your Christmas message. I've attached a sheet full of Merry Christmas labels for you to use but feel free to come up with your own.

Glue this onto the bottom of your card and then a button on either side or use more sequins / stars to finish it off.


I'll be back,

Sunday, 11 May 2014

Homemade Cat Tree

Our Cat Lemmy is always diving all over the place but always on places he should be going so we decided to make him a cat tree so that he could go up, without being told to get down!

Originally we were going to buy one from the shops but they are soooo expensive and never in colours that go with your decor so I got designing and before we knew it we had bought everything we need for it and got to work.


What you will need:

Plank of wood
black paint
twine - we used this bakers divine twine (2 rolls) to get a black and white effect but you can use any
shelves - we got ours from homebase and used 2 small, 1 medium and 1 large
doormat or rug - we got a long floor runner for cheap from The Range (pic used on the website is wrong)
Glue gun
No more nails
Drill, Raw Plugs & Screws
Fabric storage box - Optional (again we got ours from The Range)


Step 1 - Scratching post

I got a large plank of wood that was long enough to reach from my roof to the floor and started by painting it black then leaving it over night to dry. I then took the no more nails and used a paint brush to cover a 20cm section of the wood, then wrapped the twine round the wood, on top of the no more nails. Repeat this step until you run out of twine.

I also had a section at the bottom of the wood where I had ran out of twine so I cut a small strip of my rug and used my glue gun to attach it to the remaining piece of wood. You could choose to do this all the way down if you don't want to use twine.


Step 2 - The Shelves

I took the mat I bought and cut it so it was the same shapes as the tops of my shelves.

I then glued Velcro in each corner of the shelves and left to dry (which doesn't take long if you use a glue gun). I stuck the other side of the Velcro on top and put a bit of glue on top of each, then quickly placing the mat on top of the shelf and press down. Once dry you can remove the mat from the shelf and re-attach any time you need to clean it.

Tip: don't use too much glue otherwise it will go over the sides of your Velcro and you won't be able to un-stick it later


Step 3 - Assemble the Cat Tree

We took the scratching post and placed it at an angle on the corner of the room then using a couple of drawing pins, we pinned it in place so it didn't fall down for the time being

We then measured where each of the shelves needed to go so that our cat could step in between them and we also made sure the were right up against the scratching post so that when drilled in place then post can't move and you can remove the pins.

The only shelf we didn't do next to the post as the small one second from the top - we did this one out a bit more so it was easier for him to position himself onto the top shelf.


Step 4 - Hiding Space

Lemmy loves hiding in cardboard boxes so we always feel bad about throwing them out. I wanted to incorporate this into his Cat Tree but thought just sticking a cardboard box on it would look messy so we bought this small fabric box and glued Velcro on the bottom, then filled it with cardboard and packaging paper. you can then use the Velcro to attach it to any shelf you want and can easily take it off if you cat doesn't like it or you want to clean the mats. When we had finished he jumped straight in this box and didn't come out until I cooked Chicken later on that night!


Hope your cat loves it as much as ours does!

I'll be back,


Friday, 6 December 2013

O Christmas Tree, O Christmas Tree...

Hopefully by now you are all getting in the Christmas spirit...are at least getting some spirits in you!! But between all the drinking and eating, you decide you want something different from your traditional Christmas tree, then this tutorial is definitely for you!


What you need


  • 3D Christmas Tree (This one is from hobby craft and was given to me by my AMAZING friend Tatum)
  • A shed loads of buttons (I needed about 3x300g bags - which also came from hobby craft)
  • Black spray paint
  • silver paint
  • scouring pad
  • assortment of beads
  • glue gun


Step 1

Working your way round the tree, glue on your buttons. I used a hot glue gun at it makes sure the buttons are sturdy and don't start pushing each other down.


Step 2

Take the tree outside and spray paint it black, making sure you get in between all the little buttons. Also make sure it's not windy when you do it as I learnt the hard way when the black paint came back in my face! Bring the tree back inside and leave it to dry. I put it next to the heater and it dried in no time.


Step 3

Once the tree is dry, put a very small amount of silver paint on the scourer and then dab it on some paper so that there is only a thin layer. 

Gently rub the scourer down the tree until you have silver lines over the top of the buttons and you are happy with the effect. I had to go over some a few times to get the look I wanted.


Step 4

For the tree ornaments I bought a range of beads and strung them together, using this silver embroidery thread.

Step 5

I then glued the decorations evenly round the tree and then stuck these little bows over the top of the glue so you don't see the join.


There you have it and it only took 5 steps!


I'll be back xx

About This Blog

About This Blog
A blog for fun and unusual Craft tutorials This year I will be learning a new craft every month - if there is a craft you would like to learn, let me know

Search This Blog

Featured Post Via Labels

Instagram Photo Gallery