Showing posts with label pop up. Show all posts

Saturday, 19 July 2014

Pop Up Box Card Template

I have been waiting months now to tell my mum what I'd bought her for her birthday - now that a lot of time to think about how you are going to tell the person and what better way to let someone know you are taking them to see LADY GAGA than to make a pop up box card!!!!


WHAT YOU WILL NEED:

2 different types of coloured card
Strong glue (I used a hot glue gun for speed)
Cricut machine / another die cutter (unless you want to cut by hand)
Pop up box card template (links below)


The Templates


If you are using Cricut Craft room then you'll need the .ccr file


If you are using Design Space or any other die cutting machine that accepts .svg files them please use the two template below - one for basic box card and one for the happy birthday label
   

Step 1

Cut your card. If you don't have a Cricut then this is the shape you need (you can also work out the sizes from the cutting mat image I've put up in the template section as it has the sizes all round the edge)


Step 2

 Fold the top flaps out the way


Step 3

Then crease lines down the bottom half of the card so you create a box shape, also folding over the small flap on the edge


 Step 4

Glue on your 4 largest rectangles - putting the largest of the 4 next to the edge with the flap


Step 5

 Flip over the card and on the third section away from the flat - glue your birthday message, or any other message you want on the front of your card.


Step 6

 Take the two smallest rectangles and fold both ends over so that it fits inside one of the four sections of the card


Step 7

Glue down one of the folded sides of both rectangles on the second section away from the flap - giving a bit of room at the front and back of the section


Then place glue on the other sides of the folder rectangles and the flap and stick them all down so that the flap joins the card together in a square shape and the middle rectangles form 3 sections inside the box card.

Step 8

Take the pieces you want popping out of your card and glue them to the folded rectangle sections you made inside your card - this gives the box depth.

NOTE: Make sure out of all your large background rectangles, the largest of the 4 is at the back of your card, as this keeps this side of the card up whilst the others fall down.


I put in a photo of myself, my mum and Lady Gaga. I used my laminator to make the photos a bit stiffer so that they sat up straight inside the card.


Step 9

Close your card up and wait to see the surprised look on the recipients face!!! To do this you just new to put up all the flaps and then push it down to the side so that the box is folded in half along the creases you have already made


I'll be back,

Sunday, 27 April 2014

Cricut Projects


I'm getting into my Cricuting grove and I've made a few projects from the basic shapes to show you guys it's not as hard to make your own as you might think!

Now don't get me wrong, I'm up for buying their digital image packs but only if there are a lot of images in the pack I want - but when there is just that oooooone image you want, is it really worth that £30 price tag!?!? Well maybe if you are mass producing an item but not if you like to do lots of one of items like me.

So here you are you lucky ducks - not only do you not need to buy these images, you also don't need to make them from scratch, best of both worlds. Just download the files by clicking on the links below and then on the download button or arrow

To import them into your Cricut craft room, click on file, then open and you should see an import option at the bottom

I use Cricut Craft Room for my Cricut mini so if you use the same then please click on my large links above the images. However, for those using design space, I've also attempted to make an .svg vector file so you can import it as well, which is the small link below the image. Some of my files would not convert into .svg but I've done my best to support both.

I've worked hard on these images and I'm happy for you guys to use them for personal projects but

PLEASE NO NOT USE THEM FOR COMMERCIAL ITEMS!

Get in contact by emailing me on craftalavista@gmail.com if you would like to use it for a commercial project and we can discuss


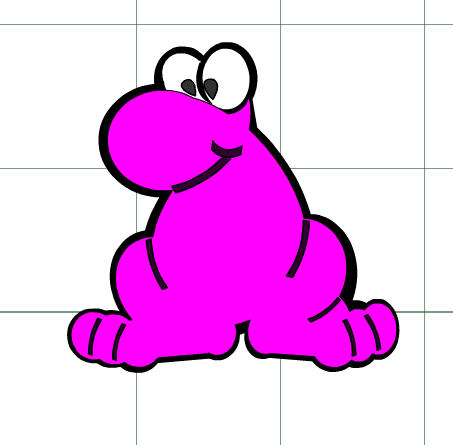
Nerd


Design Space File - nerd.svg


Diamonds

Design Space File -diamond.svg


Pop Up Box Card - Instructions & Templates (.ccr and .svg)


Superhero Face (SVG file ONLY!!!)


Ten Sided Yin Yang Globe


About to Pop Baby Shower Decorations


Cat

I have done this image in layers so that you can cut out on different coloured card


Design Space Files - cat.svg
The .svg file has the same shapes, just in black and white, so you can still put the shapes on different layers to cut out the correct colour


Superhero

I have done this image in layers so that you can cut out on different coloured card


Design Space Files - superhero.svg
The .svg doesn't have the same amount of detail but I think it still looks good in the black and white

Love Birds

Design Space Files - LoveBirds.svg


Penguins Mate for Life

Design Space Files - Penguins.svg 
(the eyes didn't appear on the .svg file but just take two small circles and put them in the eye positions)


Birthday

Design Space Files -birthday.svg


Bicycle

Design Space Files - bicycle.svg


Peacock


Wedding Image

Design Space Files - WeddingCake.svg


Rose


Design Space Files - petals.svg     leaves.svg

About This Blog

About This Blog
A blog for fun and unusual Craft tutorials This year I will be learning a new craft every month - if there is a craft you would like to learn, let me know

Search This Blog

Featured Post Via Labels

Instagram Photo Gallery