Friday, 6 December 2013

O Christmas Tree, O Christmas Tree...

Hopefully by now you are all getting in the Christmas spirit...are at least getting some spirits in you!! But between all the drinking and eating, you decide you want something different from your traditional Christmas tree, then this tutorial is definitely for you!


What you need


  • 3D Christmas Tree (This one is from hobby craft and was given to me by my AMAZING friend Tatum)
  • A shed loads of buttons (I needed about 3x300g bags - which also came from hobby craft)
  • Black spray paint
  • silver paint
  • scouring pad
  • assortment of beads
  • glue gun


Step 1

Working your way round the tree, glue on your buttons. I used a hot glue gun at it makes sure the buttons are sturdy and don't start pushing each other down.


Step 2

Take the tree outside and spray paint it black, making sure you get in between all the little buttons. Also make sure it's not windy when you do it as I learnt the hard way when the black paint came back in my face! Bring the tree back inside and leave it to dry. I put it next to the heater and it dried in no time.


Step 3

Once the tree is dry, put a very small amount of silver paint on the scourer and then dab it on some paper so that there is only a thin layer. 

Gently rub the scourer down the tree until you have silver lines over the top of the buttons and you are happy with the effect. I had to go over some a few times to get the look I wanted.


Step 4

For the tree ornaments I bought a range of beads and strung them together, using this silver embroidery thread.

Step 5

I then glued the decorations evenly round the tree and then stuck these little bows over the top of the glue so you don't see the join.


There you have it and it only took 5 steps!


I'll be back xx

Sunday, 1 December 2013

twit twoo - this is owl is easy to do!!!

For the last week I've been running a competition to win this cute little guy 
and today I announced Victoria Russell as the winner!

 BUT 

don't worry if it wasn't you as I've created this tutorial so you can create your own!


What you need

  • an owl (I got mine from hobby craft)
  • different material
  • scissors
  • PVA glue
  • 2 buttons for eyes


Step 1

Cut the material into lots of small pieces. 


Step 2

start layering the material on the owl using the PVA glue. I cut out yellow and orange flowers of the beak and feet


Step 3

Keep coving the owl until you can't see any of the original ornament, making sure that you have a thin layer of PVA glue over the top of all the material, just like you would do with normal paper decoupage. This helps you mould the material into all the curves.


Step 4

Cut two circles out of your remaining material and glue into the eye sockets, then gluing the buttons in the centre of the circles. See that wasn't difficult at all - go on, give it a go!!!


I'll be back xx


Thursday, 7 November 2013

Crafts for your new home

Moving into a new home is an exciting but stressful time! You've spent years looking at lovely things in shops saying to yourself "when I have my own house, I'll have something like this", and then when you actually buy somewhere your mind goes blank!

I spent the first month of living in my new flat flicking through house magazines and wondering how the hell I was going to be able to afford to make my home look beautiful. The thing was that there was very few things within those pages to inspire me, most if it kind of looked the same...I wanted something that was a bit more personal and wasn't going to cost the earth. It was then I started to really get into my crafting!

You can't go into a room in my house without seeing something handmade and it really makes my day when someone complements your décor, knowing that it's a little part of you.

My friend Ashley got in contact this week after moving into her very own home, asking for some help decorating. Hopefully these tutorials will help inspire you to make your home as cheerful as your personality!!!


So what better way to kick off than with the first thing your guests will see as they come in...the coat rack!

These 3 coat racks are completely different but would be a real feature piece right at your front door and all of them could be personalised. for example:

If you and your partner were animals, what would you be and why...got them? 
Why not turn that into your coat rack and then you have a fun story to tell people while hanging up your coats!

           animal coat rack - bright nest                          twig coat rack - ali does it


But no-one will see your beautiful pieces of art work without some good lighting. I've found a lamp and wall light to show you that you can have more light in your life than those plastic cones from B&Q!


DIY Decor Tutorial: Faux Table Lamps        
                    canvas light - design sponge      

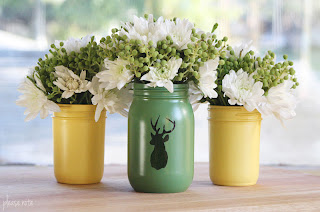
Everyone always needs a vase at the ready for when they get that unexpected bouquet and these mason jar vases can be personalised to match the colours your choose for the walls. Or if you just want something small to show off those wild flowers you are growing in your garden, then this balloon vase made me smile so much.

created at: 04/10/2011  
                       balloon vase - curbly                          jar vase - please note paper


Buying artwork for your walls can really empty your bank but the two ideas below are really inexpensive ways to fill up that empty wall space.

       
            wallpaper art - thrifty décor chic                           paper butterflies - kerry axley


and here is one for your floor...

DIY-home-decor-stenciled-rug-tutorial

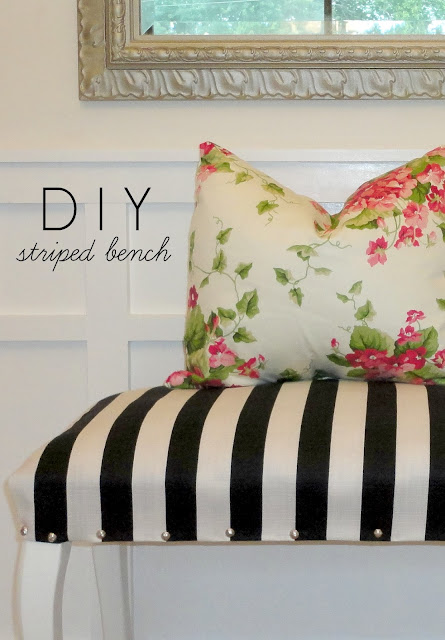
So after all that walking around your house, your guests are going to need somewhere to sit. I can't believe how simple this bench is to make considering how expensive they can be in the shops! 


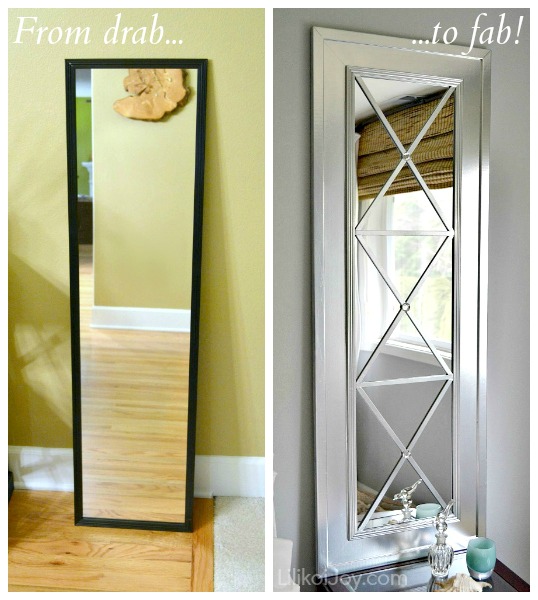
but what you asked for was ideas with mirrors and boy have I found some. The first takes a simple mirror frame and turns it into a an upmarket classy lady!

Upcycle a cheap door mirror into a glam wall mirror tutorial

or you can use beads or beans to add some texture to the wood.

a98110_1000_bearframes.jpg

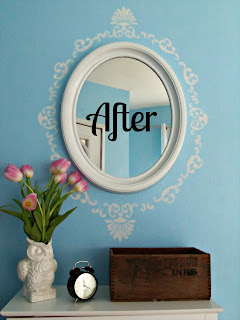
If you are happy with the actual mirror frame then why not stencil around it. You could do an Alice through the looking glass theme or make your mirror look like a vintage hand mirror.


Turn your mirrors into artwork with these tutorials. I love the touch of ribbon with the glass.

        
    love mirrors - HGTV                     text on mirrors - brassy apple


I love the idea of turning something old into something useful and this table is just gorgeous! Brilliant for when you have your friends round for a drink.


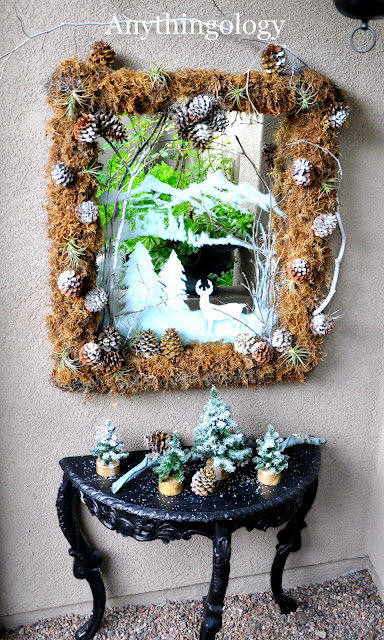
And last but not least, here is an amazing focal point for Christmas. You can never have too much outdoors indoors!


There are so many ideas out there to help you transform your home and hopefully these will help to get you on your way! 

I'll be back xx


Friday, 1 November 2013

Last Minute Halloween Decorations

Having a Halloween party tomorrow? running out of time to get things really? Well here are a few quick tutorials to make sure your party goes off without a hitch!

Last weekend I threw a Halloween party but it had been a long week at work and I had to rush Friday night and Saturday morning to get everything ready. Halloween crafting doesn't need to be difficult though so I quickly pulled together a few ideas and gave them my best crack with thinks I had lying around the house...


I used this ghost tutorial and used a cheap wreath I had bought for Christmas, which I wrapped in black material and added bats and a boo sign for a spooky welcome message! Best thing was that I didn't actually need to glue anything to the wreath so I can unwrap it all and still use it for Christmas.

floating cheesecloth ghost     


You have already seen my wallpaper bunting but this was great to jazz up the walls a bit.


These ravens were soooo cheap and easy to do. I just drew one raven as a template and then cut round it to make the others. I did some bats as well for an extra spooky feel.


To add a bit of atmosphere to the place I made these mummy candle holders using a bandage from my first aid kit, a jam jar and a couple of googly eyes which were in my sewing box (but you might have some stuck on one of your old birthday cards)


Halloween Crafts 2 15     


I had a friend coming who can't eat gluten or wheat so I wanted to make a cake she could eat, unfortunately it was so hot in the flat that it melted before see arrived and then after I cut one slice off, the cat jumped up and started licking it - typical! At least my mate got a piece.
I used this tutorial for the design and then used my cake angels book for the recipe. 


This was my favourite decoration! this creepy hand print was really easy to make and only needs PVA glue and some food colouring - easy peasy!!


Once the guests got in the mood we started playing a part game that had tricks for the losers and treats for the winners.

We had alcoholic test tube shots (pink for treats and green for tricks)

Blood-Orange Cocktails     

And for those who weren't drinking - we had spider lollies which I'd already bought on Amazon (cookies and cream for the treat and BEER flavour for the trick)


So hopefully these will help you out before tomorrow night and hope you all have an amazing time.
HAPPY HALLOWEEN


 I'll Be Back xx


About This Blog

About This Blog
A blog for fun and unusual Craft tutorials This year I will be learning a new craft every month - if there is a craft you would like to learn, let me know

Search This Blog

Featured Post Via Labels

Instagram Photo Gallery