Sunday, 27 April 2014

Cricut Projects


I'm getting into my Cricuting grove and I've made a few projects from the basic shapes to show you guys it's not as hard to make your own as you might think!

Now don't get me wrong, I'm up for buying their digital image packs but only if there are a lot of images in the pack I want - but when there is just that oooooone image you want, is it really worth that £30 price tag!?!? Well maybe if you are mass producing an item but not if you like to do lots of one of items like me.

So here you are you lucky ducks - not only do you not need to buy these images, you also don't need to make them from scratch, best of both worlds. Just download the files by clicking on the links below and then on the download button or arrow

To import them into your Cricut craft room, click on file, then open and you should see an import option at the bottom

I use Cricut Craft Room for my Cricut mini so if you use the same then please click on my large links above the images. However, for those using design space, I've also attempted to make an .svg vector file so you can import it as well, which is the small link below the image. Some of my files would not convert into .svg but I've done my best to support both.

I've worked hard on these images and I'm happy for you guys to use them for personal projects but

PLEASE NO NOT USE THEM FOR COMMERCIAL ITEMS!

Get in contact by emailing me on craftalavista@gmail.com if you would like to use it for a commercial project and we can discuss


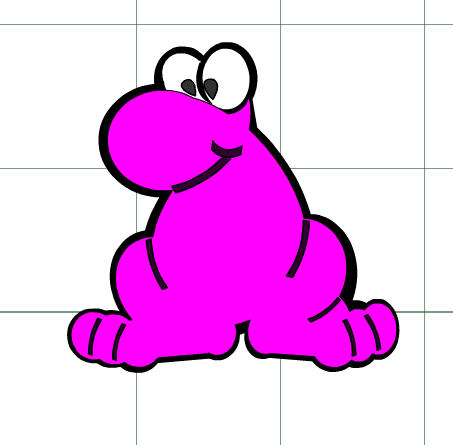
Nerd


Design Space File - nerd.svg


Diamonds

Design Space File -diamond.svg


Pop Up Box Card - Instructions & Templates (.ccr and .svg)


Superhero Face (SVG file ONLY!!!)


Ten Sided Yin Yang Globe


About to Pop Baby Shower Decorations


Cat

I have done this image in layers so that you can cut out on different coloured card


Design Space Files - cat.svg
The .svg file has the same shapes, just in black and white, so you can still put the shapes on different layers to cut out the correct colour


Superhero

I have done this image in layers so that you can cut out on different coloured card


Design Space Files - superhero.svg
The .svg doesn't have the same amount of detail but I think it still looks good in the black and white

Love Birds

Design Space Files - LoveBirds.svg


Penguins Mate for Life

Design Space Files - Penguins.svg 
(the eyes didn't appear on the .svg file but just take two small circles and put them in the eye positions)


Birthday

Design Space Files -birthday.svg


Bicycle

Design Space Files - bicycle.svg


Peacock


Wedding Image

Design Space Files - WeddingCake.svg


Rose


Design Space Files - petals.svg     leaves.svg

Thursday, 24 April 2014

Printed Loveheart Bunting

I love lovehearts, so when I got my Cricut Machine and saw this design for this heart I knew I had to make something from it.

This tutorial will take you through the template you need, how to make the lino stamp and also how to create the bunting so its a bargain 3 for 1 tutorial!!! 


What you need:

Cricut Machine & Folk Arts Festival template (or craft knife if  you don't have a cricut)
Sticky vinyl
Lino
Lino cutting tool
Super glue
Off cut of wood
Black ink
Small sheet of glass (I used a photo frame)
Rolling pin
Lino brayer roller
Linen
Hessian
Sewing Machine

Step 1 - Cut out your template

Using the online Cricut cutting room you can either create your own template or purchase ready made ones. I bought the folksy one as it has a really lovely font and lots of cute images. I loaded up my black vinyl on the cutting board and set it to the vinyl recommended settings.


Depending on how old your cricut mat is, might mean that the picture starts pealing away while it's cutting - this won't cause an issue unless a lifted piece catches the cutting knife and starts dragging it around. If this happens be ready to press stop on your computer screen quickly.

Step 2 - Cut your lino stamp

I then took my cut out vinyl design and placed it on top of a piece of cutting lino, after peeling the protective backing off. Once your sticker is stuck to the lino you can begin to cut it using your lino cutting tools (For those in Scotland, I learned how to do this at Edinburgh contemporary crafts). Once finished, your just remove the vinyl and your stamp is ready to go. 


Step 3 - Mounting your stamp (optional)

As an extra step I mounted my stamp on a block of wood with super glue so that when I was rolling ink on it I knew it was always on a flat surface and off of the floor/table. This is a step you don't need if you have a protective surface under your stamp.


Step 4 - Cut out your bunting

Take your Linen material and cut out a flag shape, which is big enough to fit your stamp. Then take the Hessian material and cut the same flag shape but slightly larger so that it acts as a border. Leave a slightly larger border at the top so you can fold it over later

Repeat this step until you are happy with the length of your bunting


Step 5 - Stamp your image

Put a little ink onto your glass - I used an old photo frame I had lying around. Then take your Lino brayer roller and roll it in the ink before rolling it across the top of your stamp.

Place the linen material on top and then roll on top of it with a rolling pin or glass for an even finish.

Step 6 - Sew your bunting flags

Pin your linen flags to your larger Hessian counterparts and then sew round the edge of each pair to attach them together. Remember to leave that larger border gap at the top!


Step 7 - Create bunting

Turn your flags over and one but one start dewing them to your twine. To do this I placed the twine near the top of the flag before folding it over on top of the twine and then sew the material in place.


Step 8 - Hang your bunting

Happily hang your bunting for everyone to admire and be dead chuffed with yourself! I know I was :)


I'll be back,


Thursday, 17 April 2014

Cricut Mini Review

This month I bought a Cricut Mini and I've been having so much fun coming up with things to cut out. There are definite pros and cons to this little beauty though so I'm going to walk you through what I like and don't like before you go buy your own.

What is a Cricut?

Cricut's are die cutting machines which let you create an image on your computer and then the machine cut's it out for you. This is great for when you want to cut out the same designs multiple times or when you are looking to cut something too intricate for your craft knife cutting skills.


Software

Cricut's Craft Room software is the worst part of this machine for me. Not only do you not get to draw your own designs from scratch, but I've also found it slow and clunky to use. Don't get me wrong  - if you buy templates from Cricut and use those as is then it works perfectly but when you start getting arty this is where the problems lie.

As I mentioned you can't draw from scratch but you can weld shapes together to make designs. The Cricut mini comes with a basic font and geometric shapes - I've played around with these shapes and you can make your own designs from them but it can be quite time consuming and sometimes frustrating when it doesn't weld the way you want or freezes. So far I've manged to make a wedding cake, 3d paper flower templates, and a bicycle from the shapes supplied so it's not impossible to do your own images and save a bit of cash.


Cutting Mat

The mat used to feed the paper into the machine becomes unsticky very quickly and this can lead to problems when cutting out your deign. you can buy more mats at about £5 each but this will get costly over time. I've also seen tutorials on refurbishing your mat but I am yet to try this and apparently it can void your warranty.

Cutting Ability

I have tried cutting out different materials with the Cricut -some are easier than others and it's not always obvious about what cutting settings should be set. The machine will guide you at a high level of what settings should be used but sometimes this guide still means you end up with cuts in your mat or gaps in your design. On the whole I've been able to cut out some pretty intricate designs and as long as the paper is stuck well to the mat then it does a good job at cutting it out but I have had a few disasters already.

Size

The mini is the "light weight" version of the more advanced cutters in the range. I was able to pack it in my small suitcase and travel with it down to London but it isn't what I would call light. However looking at the other machines available there are not many you would be able to travel with so it isn't all that bad.

Price

The Cricut mini is one of the lowest price die cutters you will find at roughly £99. I found a trick to make it even cheaper for those bargain hunters out there (For those in the UK)

  • Go to www.quidco.com and search for Hobbycraft
    • Currently you get 10% off anything from Hobbycraft when you go through Quidco
  • On the Hobbycraft website, scroll down to the bottom of the page and sign up for their Craft Club which will email you a 15% off code

  • Go back to the Hobbycraft site and then put the Cricut machine in your basket
  • At checkout enter the promo code to get 15% off your first order
  • You will end up getting both  the money off vouchers applied giving you a total of £25 off the price ( although it will be £15 at the time and £10 cash back at a later date)

Overall

I think you get what you pay for with the Cricut Mini. It is not the best die cutter on the market but for the price and the size I think it makes a great first machine to play around with before splashing out on a more costly device.

The major downside is the fact that you can't draw images free hand and need to pay extra for each set of templates you buy. This is probably good for people who don't want to spend a lot of time drawing themselves but I don't like to be so restricted. However I have liked the challenge of making my own templates from the free shapes they give you and I will export my designs to this blog so that you guys can use them as well. You can download them from this page

Overall I would give it 3/5


I'll be back,


Sunday, 23 March 2014

Shine bright like a diamond - with home made diamond soap!


I have a friend who's name inspired my newest bathroom beauty! Ms Tatum Diamond (I know - it's an awesome name) is my bezzie London mate and fellow crafter / artist! She's always a ray of sunshine in my life so both her personality and name are shining through in this diamond soap I've made for her


What you will need:

Essential Oil - I got mine from Essential Oils Direct on Amazon for super cheap
Small heat proof tub if you want to make the larger bar of soap
Plastic wrap

Step 1

Melt your soap down like I showed you on the Voodoo Doll soap tutorial!


Step 2

Add the glitter to the soap. How much you put in depends on how glittery you want your soap to be. I only put in a little to begin with and once my soap has set I noticed that all the glitter had drifted to the bottom - that's fine though as you can just put it back in your melting bowl and add more glitter before trying again.


I also added some orange & ginger essential oil so make the soap smell lovely and fresh.

Step 3

Pour the soap into the mould. I made sure the soap goes right to the top and I used the blunt end of a knife to take the bubbles off the top so that the soap sets clear. 

You can also apparently spray a little rubbing alcohol on the top of your soap to remove the bubble but I didn't have any in the house to try this.


You can put your soap in the freezer for 15 mins or so to help quicken the setting process but don't leave it in for too long or your soap will sweat. 

Step 4

Once set, remove the soap from it's mould and you will have your own soap diamond!

Make sure the soap is solid all the way through before taking them out - The first one I tried had only set on top and when I tried to squeeze it out, the soap spurted all over the kitchen. whoops...


Optional Steps

Step 5

I wanted to make 1 large bar of soap rather than lots of mini ones, so I melted down some more clear soap and added it to a small container which is pre-covered with plastic wrap so you can easily pull your soap out.

You want to get the plastic wrap in without it being all liney as it will put creases in your soap. the easiest way I've found to do this is by laying the plastic wrap over the top and pressing it down slightly before filling the container slowly with water - this makes the plastic wrap stick round the sides. Scrunch up all the remaining plastic wrap round the outside and then pour the water out so that it is now ready for the soap

One the soap is in the container and you have left it to set for a few minutes, carefully place your diamonds inside. The reason why I leave it to set a little is so the diamonds don't sink right to the bottom of the soap, instead sitting nicely in the middle. 


Step 6

Leave the soap to set (again you can put it in the freezer). Press down on it gently and see if it is still squidgy - you want it to be a little soft but you don't want there to be any liquid that hasn't set in the middle otherwise when you remove it from the container your soap might burst open and you will get air bubbles inside, like you can see in the photo below.

Remove the soap from the container before it fully sets solid and sit it out to set until completely firm. 


Step 7

Package your soap up and give it you the friend that adds a bit of sparkle to your life!


I'll be back,


Sunday, 16 March 2014

Who do Voodoo - Make your own Voodoo soap

My friend Neil always buys the most awesome gifts (and finds the coolest wrapping paper) so when he gave me this voodoo doll cookie cutter I knew I was going to put it to good use!


I've always admired the people that can make soap look like cakes, and I guess a cookie is pretty close to a cake so when I decided to start making soap this cookie cutter was the first thing I pulled out the baking cupboard. The Voodoo doll itself was really simple but adding the red colour soap on top was a bit more difficult - not necessary to still make a really cool soap....so let's get cracking!


What you will need:

Essential Oil - I got mine from Essential Oils Direct on Amazon for super cheap
 Cinnamon - I used this for colouring and it has a nice smell
Red food colouring
Some kind of container that is big enough to contain your cookie cutter and is heat proof
plastic wrap


Step 1

Check your cookie cutter fits in your container. If you want to do lots you can use a much bigger container but I only wanted to do a couple as only had 1kg of soap and I didn't want to use it all up


Step 2

Take the cookie cutter out of the container and place it next to it. Then fill the container with water until it is level with the top of the cookie cutter. 

Don't overfill as it will make it very difficult to cut out your soap


Step 3

Get rid of any of the remaining water left in the jug and then pour the water from the container back in the jug.

This will let you know how much soap you need - I had 500ml of water so I needed 500g of soap, which I then measured out in a glass bowl


Step 4

Dry out your container and then cover the inside in plastic wrap. Smooth it out as much as you can so that you don't end up with lines across your soap.


Step 5

Put the water you had in your jug in a pan (adding more/less as needed depending on the size of your pan) and then put the bowl on top and start melting your soap. The water shouldn't be touching the bottom of your bowl, it should be just enough so that the bottom of your pan doesn't burn.

You can also melt your soap in the microwave but I prefer old school - Just Google microwave melt and pour soap if you want to find out more


Step 6

Pour your melted soap back into the jug and then you can start adding the smelly stuff! I used orange and a tiny drop of ginger oil, then adding a dash of cinnamon for the colour and extra Christmassy smell.

If you are struggling to get any lumps out of your cinnamon you can put it back on the heat for a little but and that helps smooth it out


Step 7

Make sure your cookie cutter is back next to the container and pour in your soap. I filled 2 containers with this amount


Step 8

Leave your soap to set for 15 minutes and then check to see how it's doing. It should be all one piece but still flexible so you can bend it without breaking. If you leave it too long then it will it make it too hard to mould


Step 9

Remove your soap from the container and then press your cookie cutter on it


Step 10

Remove the remaining soap from around the side and place it on some grease proof paper or same plastic wrap if it's not ripped


Step 11

Take the side of your cookie cutter that has the design and press it down on top of your soap. Again this needs to be done before your soap gets too solid.

Once I removed the cutter, I then pressed down in the heart a little more to give me some more room for the red soap.


Step 12

Take your remaining bits of soap and melt it back down again, adding a couple of dashes of red food colouring.


Step 13

Drizzel the red soap into all the places of the voodoo doll you want to be a bit darker. I left the soap to set a little before starting so it was a bit thicker and easier to pour.


Step 14

Leave your soap until it is completely solid and then you can put it in your bathroom to entertain all your friends or you can give it to someone as an awesome gift - and if someone gave you the cookie cutter you are using then remember to pay them back with one of you homemade soaps!


I'll be back xx

About This Blog

About This Blog
A blog for fun and unusual Craft tutorials This year I will be learning a new craft every month - if there is a craft you would like to learn, let me know

Search This Blog

Featured Post Via Labels

Instagram Photo Gallery