Wednesday 29 January 2014

Hidden Storage Solutions

My woodwork skills are really coming along and although my month of woodwork is nearly over, I think this is something that I will continue improving on because my flat is going to look so much better for the new storage solutions I'm creating.

But if you have had your fair share of book cases and storage boxes then check out these extremely cleaver storage solutions. Your friends and family will never know what you've hidden away!

This shelf has a secret compartment to hide those small items that clutter up your room

Picture of Floating shelf w/ secret compartment (I made it at TechShop!)

I love this picture frame storage for jewellery. I have lots of lovely pieces that sit in a drawer but this would keep them neat and stop them getting broken


Bored of having shampoos and cleaners all over your bathroom - well why not try this out for size?
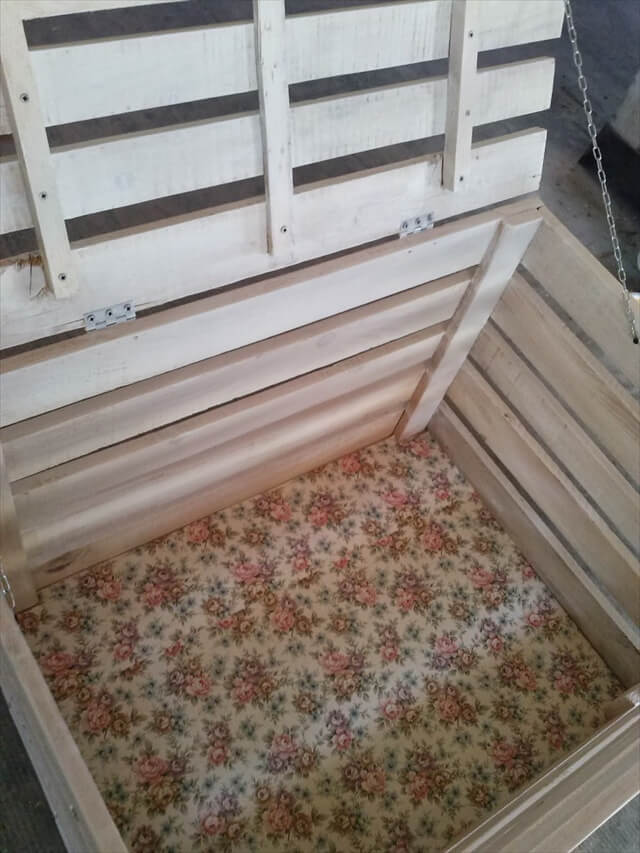
There is no tutorial for this one but you could do something similar with wooden panels, some hinges and a locking mechanism to stop the panels opening.
stowaway bath panel

This bar is is AMAZING and all it took was a couple of Ikea bookcases hinged together on one side , then cover the outer in leather type material and stud round the edges. To finish it off put wheels on the bottom for easy movement and a lock on the front to hold it together!

This last tutorial however is the piece de resistance! Everyone has seen one of those bookcases that leads to a secret passageway...well now you can build your own and shock all your friends with your awesome skills


Be careful you don't end up going overboard like these folks though!!! 


For more fun hidden storage - check out my Pinterest


I'll be back xx


Sunday 26 January 2014

I'm on cloud nine with my woodwork skills!!

My sister is due a baby in just a couple of weeks now and my boyfriend and I are helping to decorate their nursery. she wanted a jungle theme so we are covering the walls in jungle animals and trees so to help the shelves blend into the picture, we decided to make some that look like clouds!

There were actually really simple to do - either that or my woodwork skills are improving!


What You Need:

Thick wood - I used a pine shelf I got from Homebase
2 corner plates
screws
hot glue / wood glue
2 picture hooks
drill
sander
jigsaw

Step 1

Cut out a length of wood for the main part of your shelf (mine was 40cm long). You will also need 2 cloud shapes - one large cloud which is slightly bigger than the length of your shelf and one thats about half the length of your shelf.

Then cut the large cloud so that the bottom is the same length as the shelf but keep those end parts as you will need them later.

Sand your piece down and then you will be ready to assemble your shelf.


Step 2

Then using your corner plates, screw the large cloud to the base of your shelf on both sides. This will make your shelf sturdy


Step 3

Take your two left over bits of the cloud and cut a smaller gap in each and this will left them sit flush against your cloud with the screws inside


Step 4

Glue the ends back onto the large cloud and fill in the gaps with glue so they create a smooth surface


Step 5

Glue your small cloud to the other side of your base, picking either the left or right hand side of your shelf


Step 6

Give your shelf a couple coats of white paint to finish it off


Step 7

Screw some picture hooks into the top of your large cloud and then you can use these to nail your shelf into the wall

Step 8

Fill with your favourite toys and books but test it out before putting anything too heavy on it


Sunday 12 January 2014

Build your own Storage before this years Spring Clean!

This week I've been searching the net for some interesting storage ideas to help inspire me for the rest of my Craft cupboard 2.0 and I'f found some pretty interesting projects. Hopefully these people will help inspire you to and help make some useful storage items before you start your spring cleaning this year.


I love these personalised storage boxes from That's My Letter. They are a very classy looking shape and the idea of personalising them for the members of your family is a good way to keep everything organised.


Or if you are looking for something a bit simpler then this large storage crate is a really useful way to store blankets or toys but you still have the ability to see what's inside so you don't need to dig to the bottom to remember what's in there


I love this bar and I'm really tempted to make it for rolling my craft stuff from the bedroom to the living room so that I can stop dropping stuff on the way through! It would also double up as a handy service trolley for when we have friends round.
diy-bar-cart


There are always lots of bits and piece you need to have stored in your bathroom, especially if you have kids so what about building this stool so you can help hide all those toys and your little one will be able to reach the sink with ease!


I like me you have ended up with lots of booze after Christmas and New Year then there are two funky ways for you to be able to store them but also turn them into a focal point in your house
Mind Bottling        


And if you don't mind paying for your woodwork plans then Iron Timber has some really great ideas up for sale in their Etsy Shop so pop over and check them out
Storage Bins Woodworking Plans


If you have something you would like to make out of wood but not sure how to do it, then get in touch on www.facebook.com/craftalavista and I'll see if I can find some tutorials to help you out

I'll be back xx

Sunday 5 January 2014

Craft Cupboard 2.0 - Week 1 - The Haberdashery Shelf

So I made a new years resolution that I was going to learn a new craft every month this year so 2014 is definitely going to be a busy year. However before I can even start to think about that I had to do something about my craft cupboard. I had been so busy crafting on the run up to Christmas that I had just shoved things in everywhere and it was now over flowing.

Then it hit me - why don't I merge tidying my cupboard with learning a new skill - WOODWORK!!!

I started designing craft cupboard 2.0 immediately and was very pleased with my plans, masking taping them to the wall for inspiration

I couldn't wait to get started the next day and dragged my boyfriend to the local DIY shop (Homebase) to help me pick out wood. I was all ready to by sheets and sheets of wood but Quinn recommend I just buy a couple to get me started and then if it works out ok then I can come back for more. Luckily it had turned out I'd bought enough for 1 shelves worth of wooden tidies and that was hard enough work in itself! Turns out my plans to have the whole cupboard finished by the end of this week was a bit inspirational but I am very happy with what I've managed to achieve.

The first shelf I started with is my Haberdashery shelf for all my material, wool, buttons, ribbon and thread. I didn't think I had to much for this shelf but it turns out there was lots of things hiding in there and I might need to do a wee bit of a further clear out


For the stuffing and wool I just made your average box. Actually the material one is the same but I wrapped the material around piece of cardboard before slotting them into the box so that I can easily see what I have to hand. I made two of these material boxes, putting one in front of the other.

For the 3 in the middle they were slightly more complicated so I've made a tutorial for each in case you want to learn how to make your own!


Hope this inspires you guys and hopefully over the next few weeks I'll have some more time to tackle another shelf

I'll be back xx

Get outta my drawers!

You can never have enough buttons but I have loads and they are in every nook and cranny of my craft cupboard so as part of craft cupboard 2.0 I wanted to make my own set of drawers to store them in. It really wasn't as hard as I thought it was going to be although I won't be winning any prises for my woodwork skills just yet as it was all a little bit wiggly! Still as long as the drawers pull in and out, what ease do you need?!?!


What you need:

Wood (I got 6mm thick MDF from Homebase and a thinner one for the sides of the drawers)
Wooden dowelling
Wooden angle moulding (you can find this next to the dowelling in Homebase)
Hot glue gun


Step 1

Cut the wood to fit the space you are doing to put it in. My shelf was 38cm tall by 38cm depth and I had a 14cm gap on my shelf, so I cut the following:
38x38cm - 2 pieces (sides of outer drawers)
38x10cm - 2 pieces (top & bottom of outer drawers)
38x12cm - 1 piece (back of outer drawers)
36.5x8.5cm - 3 pieces (bottom of drawers)
36.5x4.5cm - 8 pieces (sides of drawers)
9.5x9cm - 3 pieces (front of 3 drawers)
9.5x5cm - 1 piece (front of top drawer)
8x5cm - 4 pieces (backs of all drawers)
36 cm angle dowelling - 6 pieces (drawer runners)
2.5cm long dowelling - 4 pieces (handles)

Then sanded it all down so that it was all ready to be glued together.


Step 2

Glue the top and bottom of the outer drawers to the left hand side at a 90 degree angle.

Step 3

on the left and right hand side of the outer drawers, measure even spaces of where you want to place the drawer runners, making sure you put them at the same distance down on both sides. I made mine shorter than the wood you are gluing them to and then glued them so that there was a small gap at the front and the back.

I also wanted my top drawer to be slightly smaller than the others so I left a little less space between those runners and the top of the drawers.


Step 4

Flip the right hand side over and glue it down so that the runners are on the inside. Then you can glue the back piece onto your outer drawers as well

Step 5

Now you want to make your actual drawers. Glue the two side pieces onto the drawer base at a 90 degree angle. Repeat for all 4 drawers


Step 6

Take the front and back pieces and glue them on. I then went round the inside of all the drawers and did a layer of glue as I hadn't cut the wood quite straight enough and this filled in all the small gaps so no buttons would fall out.


Step 7

Take your small pieces of dowelling and glue one to the front for each of your drawers.


Step 8

As an extra step you can also make some dividers to glue into your drawers. This worked well for my drawers as my shelf is so deep it meant I could keep the drawers thin and make the most out of the length of them.

I also put a triangle divider into the top drawer and then covers some stuffing in material to make a small pin cushion, so that I could store all my pins and needles in a safe place.


Step 9

Then just put each of your drawers into the outer structure and fill it with all the bits and bobs you have lying around


I'll be back xx


Thread Tidy

I'm always finding thread all over my house! I made the mistake of leaving it on a table and before you know it my cats have hidden it somewhere to play with it later, the sneaky devils! So if you have a similar problem or just want to keep those threads tidy then here is the tutorial for you!


What you need:

Wood (I got 6mm thick MDF from Homebase and a thinner one for the sides of the top shelf )
Wooden dowelling (smaller than your thread reels)
Hot glue gun
Drill piece that can make a hole larger than the size of your fingers


Step 1

Cut the wood to fit the space you are doing to put it in. My shelf was 38cm tall by 38cm depth and I had a 8cm gap on my shelf, so I cut the following:
38x8cm - 2 pieces (front and back)
36x8cm - 3 pieces (shelves)
36x7cm - 1 piece (top shelf)
36x3cm - 2 pieces (sides of top shelf)
5cm long dowelling - 25 pieces

Then sanded it all down so that it was all ready to be glued together.


Step 2

On the bottom shelf, mark out where you would like to have your thread stands. I used my actual thread reels to measure out how much distance I needed between each and also staggered the two sides (I managed to fit in 17).

One the middle shelf I was going to place my larger thread reels so I just marked 8 circles right the way down the middle


Step 3

Using my glue gun, I glued the dowelling on to the markers. You can drill into the shelves first so that the dowelling sits in the holes but I found the glue held fine without this step

And as you can see the cats are already confused about why they can't move the thread away! Almost there!!!


Step 4

Glue the sides of the top shelf on either side of the base, making sure it is sitting at a 90 degree angle to each other


Step 5

Glue each of your shelves to the back of the thread holder, again making sure they are all sitting at a 90 degree angle to the back of the holder


Step 6

Place the front of the thread holder on the other sides of the shelves (but don't glue yet) and mark out where you would like to put the finger holes on the front, making sure there won't be a shelf in the way. Then drill out the holes.


Step 7

Glue the front of the thread holder on to the other ends of the shelves to complete your holder.


Step 8

Your thread holder is now ready to start being filled. I use that top shelf for all those wee bits of thread that are not on reels and also those pesky tape measures which you can never find when you need them.


I'll be back xx


Ribbon Tidy

I love ribbon, so many pretty colours and designs but I always end up with lots of little bits and pieces that are all over the place. As part of cleaning up my crafty act in 2014 I've made this ribbon tidy so that they no longer get lost at the bottom of my cupboard


What you need:

Wood (I got 6mm thick MDF from Homebase)
Wooden dowelling
Twine
Hot glue gun
Drill piece that will cut a hole larger than your dowelling

Step 1

Cut the wood to fit the space you are doing to put it in. My shelf was 38cm tall by 38cm depth and I had a 9cm gap on my shelf, so I cut the following:
38x9cm - 2 pieces
36x9cm - 2 pieces
45cm long dowelling - 2 pieces
2 squares of wood that are larger than the hole you will cut with your drill piece later on

Step 2

Drill 2 holes in each of your largest pieces of wood. Measure where you are going to drill the holes as it needs to be exactly the same on both pieces of wood as your dowelling will go through each. I also drilled a smaller hole further down the wood for my ribbon that had a very small centre hole to go through.

Step 3 

Take your two smaller pieces of wood and glue them at 90 degree angles to one of the larger pieces and let dry

Step 4

Put glue on the other ends of the small pieces of wood and then line up your remaining large piece of wood on top, making sure that it matches the holes on the other side

Step 5

Glue your small wooden squares to one end of each of the dowelling and then put the dowelling through the holes. 

Step 6

Your ribbon holder is now ready to start being filled. You can easily pull the dowelling out to put the rolls of ribbon on or if you have pieces of ribbon that are not on reels then you can tape the end to the dowelling itself and then roll it on, before taping the other end. 

For my ribbon with smaller reels, I knotted a piece of twine and threaded it through on of the smaller holes, then filled it up with ribbon before threading it through the other side and knotting again. I also used some more twine to tie all my balls of twine to the top of the holder, saving more room.

REMEMBER not to fill your dowelling up too much as it needs to have a bit of room left so you can pull them out without all the ribbon falling off them


I'll be back xx


About This Blog

About This Blog
A blog for fun and unusual Craft tutorials This year I will be learning a new craft every month - if there is a craft you would like to learn, let me know

Search This Blog

Featured Post Via Labels

Instagram Photo Gallery