Monday 30 September 2013

A crazy little thing called art

Ever looked at a picture and had to double take? Well I love that kind of artwork, the kind that really makes you look closely to see the real image. Don't worry, I'm not going to start throwing arty terms about because I'll probably use them wrong but here are a few crazy pieces of artwork you'll love to get your head around!

One of my favourite artists is Tom French. His use of figures within a face or skull is extremely clever. I'm a big fan of skull artwork as my friends and family will tell you, so even just the outer image I find gorgeous but as your eyes start to peal away the surroundings and focus on to the figures contained inside I am just outstanded by the level of details and emotion that comes from the people inside the painting.

   Dualism (3) hand finished_with background_b       Cranio Anatomia_Tom French 2

But Tom isn't the only artist that uses this concept. What about this take on a Van Gogh by Oleg Shuplyak! If you click on the link below the image then you will see many more famous figures transformed into optical illusions.


The next painting by George A Wotherspoon takes a simple piece of human nature, gossiping, and shows it's sinister side as it's portrayed inside the face of a devil
Gossip, and Satan came also Created by George A. Wotherspoon

Finally we have a picture from Rob Gonsalves. This one takes a different direction by taking figures and transforming them into a beautiful landscape.

Rob Gonsalves - Water Dancers

If of any you have favourite pieces of illusion artwork then please share them in the comments section below. We would love to see them!

I'll be back xx

Thursday 26 September 2013

I'm a crazy cat lady!

I have 2 cats and I love them to pieces. Meet Jess and Lemmy


Quite a few of my friends and family have cats to and yes...most of us are crazy cat ladies :)

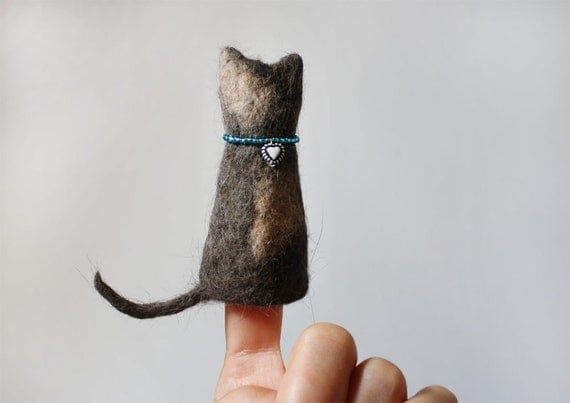
So picture this - it's your birthday and your mate has just handed you a present. You are both massive cat fans and she always gets you something cat related (which you love) but this year she's gone that extra mile with your gift and got you one of these:

felted kitty finger puppet - felted out of real cat hair

Awww how cute, and look at that little sweet necklace but can you believe it's really made out of cat hair?!?!

You may find yourself asking - Where would I keep something like that in my house...

Etsy.com handmade and vintage goods

How about your very own Cat Hair Trinket Box? The How Tuesday blog even gives you instructions on how to make your own so that you can wrap your Christmas presents extra  special this year

Ok so your friend is more of a jewellery person - don't worry we have something for them as well

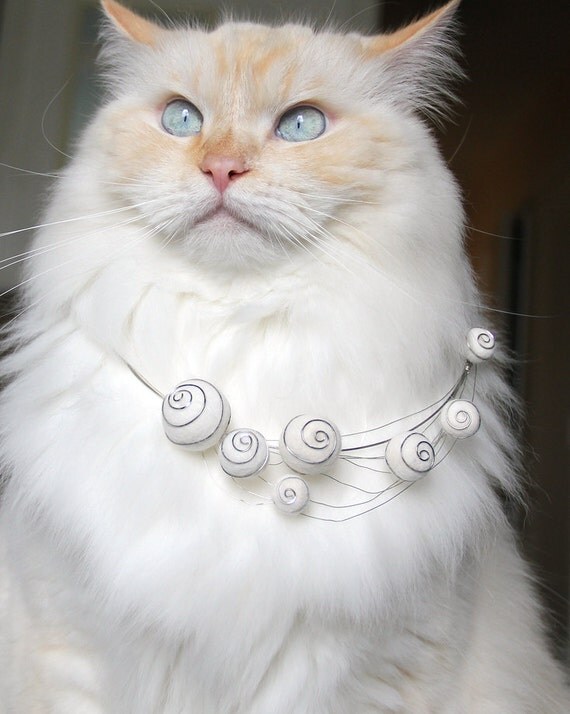
Spirally Haze Cat Hair Necklace

This is a beautiful piece that is modeled by one of the best in her field - look at that smeyes (smiling with your eyes for all you non top model fans)

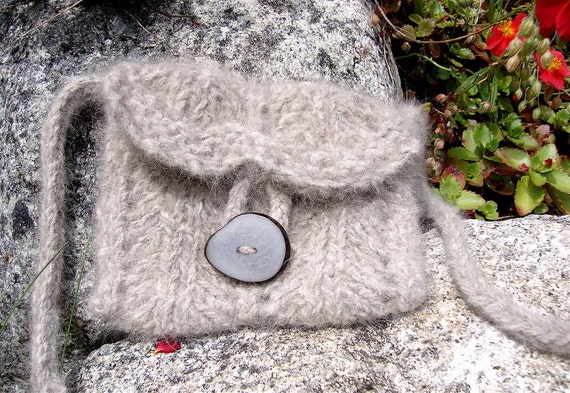
Or what about a handbag, you know a girl can never have to many of those!


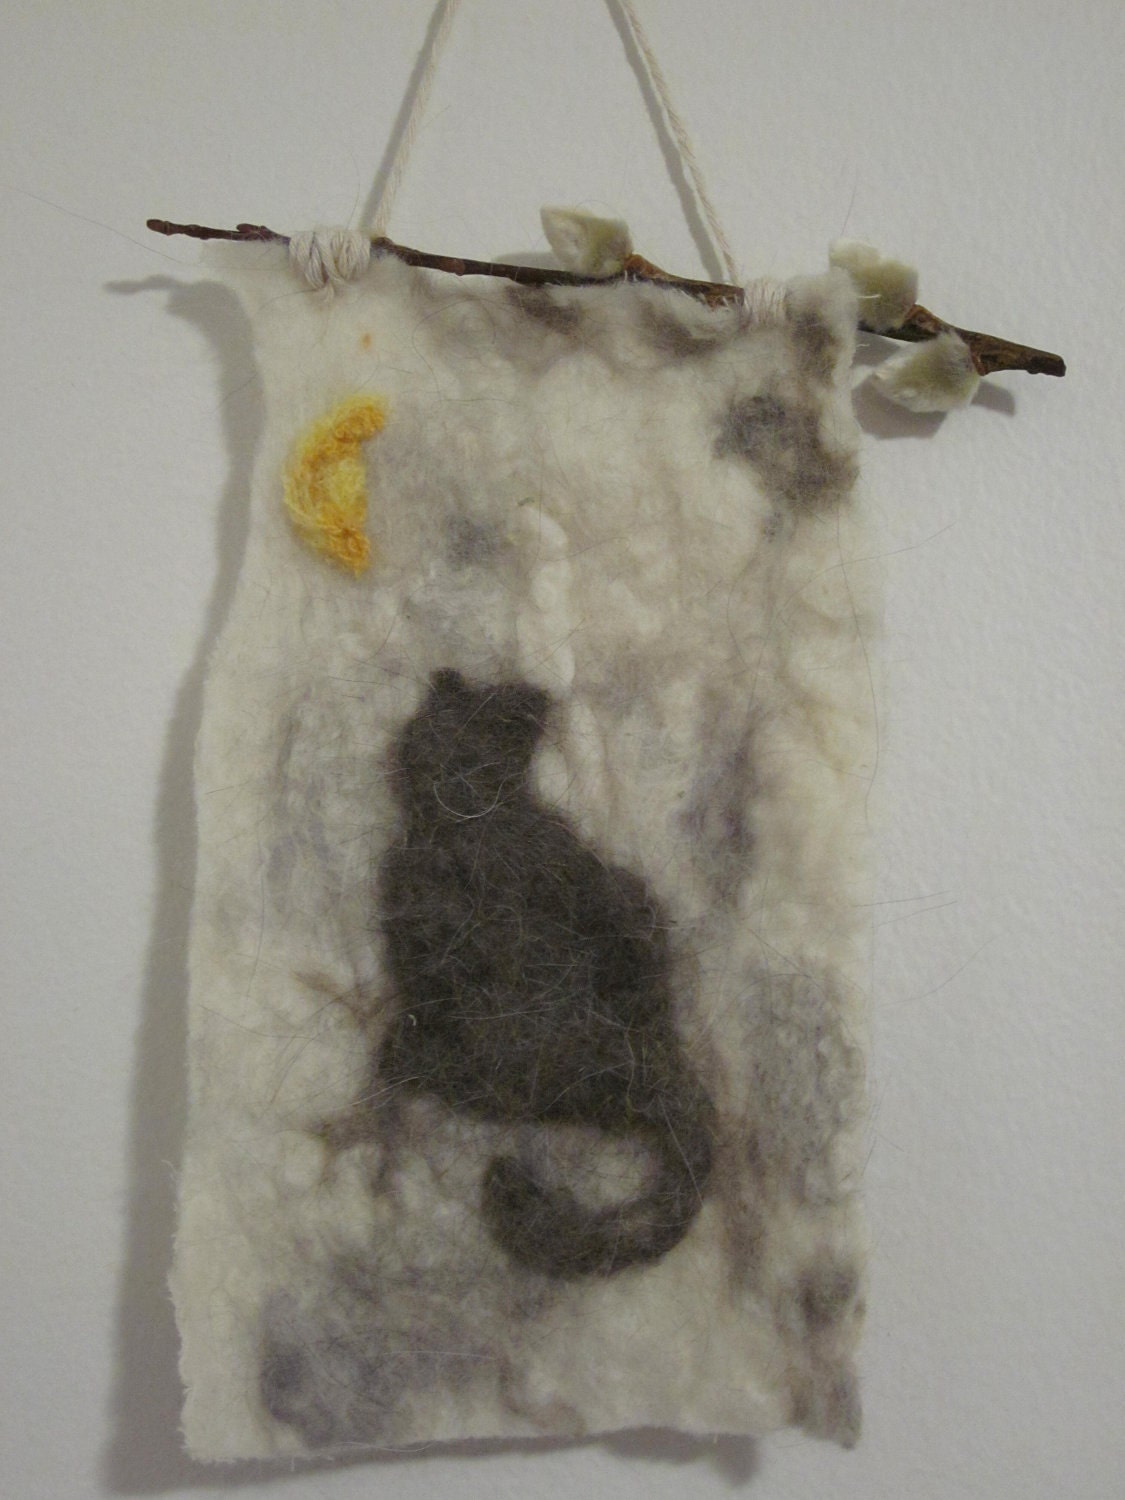
And if your friend has just moved into a new house, then how about a unique piece of art work to hang in pride of place...

Cat Hair Wall Hanging

So the next time you open a gift from your friend with a cat, think about all the possible things that could be inside that package!

I'll be back xx

Wednesday 25 September 2013

Let's go Crazy!!!!!

The world has got too serious for my liking this week so I'm shaking it up with a week of crazy crafts!

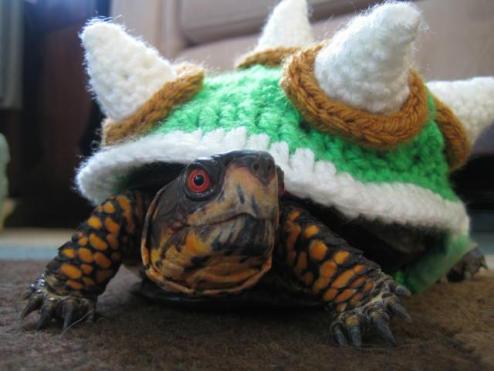
Starting with the most amazing turtle jumper on this planet - enough said, blog over and out :)


Bowser Sweater for a Turtle

Saturday 21 September 2013

Kitsch Kitchen Storage

If like me, your kitchen is a tad on the small side then coming up with crafty storage solutions is a necessity!! So feast your eyes on these beauties...

the right shade of green
Not only is this a fab way to store your utensils but you would save the space of a whole drawer. All you need is a few cane hoop, some wire to connect them together and then some S shape hooks to put over the top of the hoops. If your utensils don't have a hole to hang them on at the bottom then you could drill one. Simple but so effective!

Make great super hero jar toy storage in minutes with this super simple tutorial.  Plus learn all about the new Super Buddies movie from Disney.

Jazz up those pasta jars with this super tutorial! You don't even need to stick with these superhero figures, you could use something like wooden letters instead.


For all your extreme couponers out there, think about how much cupboard space you could save with one of these on your wall. You could even add hooks for can openers!


Or if you want something a bit more classy - what about this creation! However I do think if you have small kids running about, this probably isn't the safest of the two options.

mld106600_0211_wine1.jpg

This isn't really a space saving tutorial but it is a beautiful way to display your wine - you could paint it any colour to fit in with your decor and it it can be finished in 4 simple steps. Also you get to have a bit of Martha Stewart in your house!


I'll be back xx


Tuesday 17 September 2013

Make me look beautiful darling

Ask any of my friends an family, went I was younger I was a proper tomboy. Until a few years ago, I had black eye shadow and lots of eyeliner but that was about it in the make up department.

So what changed you may ask...well I moved to London and met the fabulous Tatum who showed me the wonders of red lipstick

After that there was no going back and my wardrobe, make up and accessory collections have just kept growing. I badly need some good storage solution for it all but i want something that is easy to access and looks pretty too. 

Here are some of the idea's I've found while searching the web this week:


I love this magnetic board by Laura. It's so pretty and just makes it so easy to find what you are looking for, rather than raking around that makeup bag. I also have a crazy amount of nail polish in my drawers so it would be great to make it into art on my wall instead.

        11                   

I have quite a collection of fascinators and hair bands but at the moment I'm using my guitar strings as my storage board for them (much to my boyfriend's despair). The ribbon idea is super simple and I'm definitely going to give it a go but the framed canvas is really cool as well - I'm starting to think about all the cool storage frames I can have up in my bedroom instead of art!!!


I LOVE THIS JEWELLERY BOX!!! What an amazing idea and a great use of upcycling. It would also be a great gift for the Harry Potter fan in your life - can you imagine how much jewellery you  could fit in one of those!

I just can't wait to get started on transforming my bedroom this year. I hope these tutorials have inspired you as much as they have me.

I'll be back xx

Monday 16 September 2013

Crafty Storage Solutions

It's a new week and boy is it a cold one...the weather has suddenly changed and I've had to put the heating on for the first time brrrrr

But on the bright side it also means a new blog theme and while you are tucked up warm in your house, what better to do than start organising all those bits and pieces you have collected over the summer months.


While searching around this week I found a fun one to do with the kids - check out these fab storage boxes by Aimee Ledwell.


In the tutorial she uses orange boxes but I've come up with some alternatives if you can't get your hands on them:

Empty Shoe Boxes

Plant Pots

Empty Food Cartons

I've found so many more amazing things to show you this week...I'm soooo excited!!!

I'll be back xx

Sunday 15 September 2013

Sunday afternoon crafts from Friday night's bottles

You have spend Friday night polishing off that bottle of booze with your best mates, on Saturday you couldn't even face the mess you have left in the kitchen  but wait...before you start throwing away those empty bottles on Sunday, thing about what fabulous things your could make from them!

Booze Bottle Lamp


My mate Corrine has always had a sense of style that's inspired me since we started uni together - from her Marlin Monroe picture in her dorm room in first year to the very cool new black and white theme which has started to transform her livingroom. She was the one who showed me the wonders of a Gin & Tonic so after a fun night in the flat I kept the bottle and hatched a plan to make her a present (don't get too excited Cozza, it all goes horribly wrong)

Step 1
I started by soaking the bottle in hot water until the labels fell off. This also helped to clean out the bottle.

It's up to you whether you want to do this part as you might prefer the look of your bottle with the label still on. Leave your bottle to dry upside down as you down want to mix electricals with water. and when dry you will be ready to start.

You will need:
  • 1 empty bottle 
  • wire
  • plug
  • light fitting
  • wire cap (for earth wire if your light fitting is plastic)
  • drill piece for ceramics (must be a larger diameter than your wire)
  • glue gun
  • protective gear (minimum requirements - goggles and mask)


Step 2
Get suited up and put your goggles on! You are going to drill glass so make sure you are safe!


Step 3
Lie your bottle down on it's front. If you think you might struggle to hold and drill it then ask someone to help you out.


PLEASE BE CAREFUL WHEN YOU DO THIS - otherwise this might happen :(


Sorry Corrine, I really did want to make you a present but it wasn't to be this time - we will just need to drink another bottle YAY silver lining and all that

Step 3.5
Get another bottle


Step 4
Do a happy dance when you manage to drill a hole in the bottle without breaking it


Step 5
Feed your cable through the hole and up through the opening on your bottle


Step 6
BE CAREFUL WHEN WIRING THE LIGHT! 
This part is very dangerous, if you wire the light incorrectly, then you could electrocute yourself so please Google how to do this before you start.

I took my piece of wire and striped it back as required. I then hooked it up to the light fitting and put a wire cap on the earth wire. 
Note: you only need to connect the earth wire to the fitting if it is metal. My fitting is plastic so I just capped it off - do NOT leave any loose wires hanging without capping them.


Step 7
When the light fitting is in place, put a bit of glue round the top of the bottle to keep it in place...again be very careful not to get any hot glue on the wires or metal connectors in your fitting!


Step 8
Put your lampshade on and screw the white plastic bit of the fitting back on to keep it in place. Then put your light bulb in and turn it on!!!


I tried it with a few different shades before I settled on one but I thought they all looked nice.

The final result works really well with in our livingroom (is it bad that it makes me kinda happy the Gin bottle broke tehe)


Oh - and if you don't want to make your own, then please feel free to send us some booze and I'd be quite happy to make you one with the empty after I've drank our way through it!

I'll be back xx

Bring your photographs to life

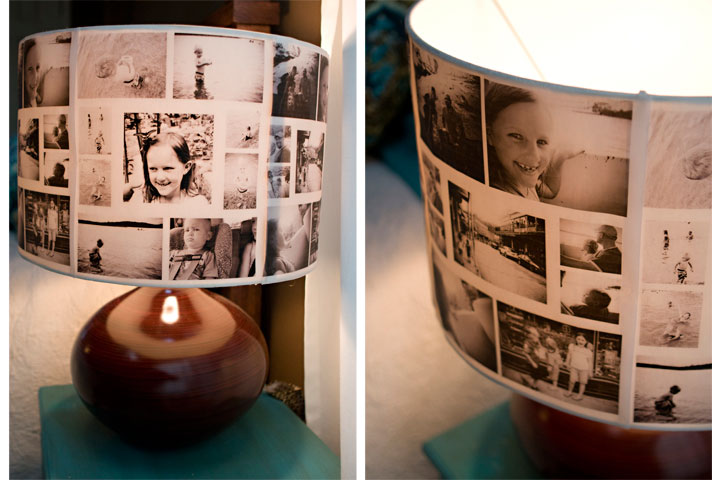
As you may has got by now I love photographs and this tutorial by Ashley Ann made me smile so much! I love the idea of personalising a lampshade with my friends and family.


  Photo lampshade by Ashley Ann

After a bit more digging I found some more tutorials for something similar:

               how to make lampshades         

lamp_shade.jpg          MJ-04-042-face-lamp-hi-res.jpg


Out of all of them though, this one is the simplest so if you are looking for one that is quick and easy then this is the tutorial for you


I'll be back xx

Saturday 14 September 2013

Take my hat off to you

I love unusual looking lights and recently I stumbled across the idea of mixing head-wear and home-wear together


no not like this....although it is a rather fetching choice of outfit. I was meaning something more like this:


After getting some inspiration from an awesome blog by Kate Albrecht I started thinking about how I could make one of these for myself and then it hit me that I had a top hat gathering dust in my craft cupboard


I'm not going to lie, it took a while to find it as y cupboard is pretty jam packed at the moment but it was well worth it. 

This lampshade was the simplest craft project I have done in a while. All I had to do was take a pair of scissors and cut a small hole in the top of the hat. Then I unscrewed my current lampshade in the livingroom and pushed the screw lamp base through the hole before screwing the white piece of plastic back on.

I used a low watt energy efficient light bulb as i was afraid the hat might burn but I've been using it for a couple of months now and it's all good as the hat doesn't touch the bulb - so give it a go, it really is that simple.


REMEMBER - don't let the bulb touch the hat and if you are worried about it looking like a fire hazard then take it down immediately

I'll be back xx

Wednesday 11 September 2013

Where do the weeks go?!?!

I have been up and down the country over the last couple of weeks and it's amazing how quickly time flies!
Sorry for my sudden disappearance but I'm back with a vengeance and this week we will carry on with the lighting theme we never quite got round to!

 As always I wanted to start the week off with something simple to get you started, so I went searching the web for more amazing tutorials and came across this one


All you need is: 
  • a lampshade
  • LOADS of buttons 
  • a glue gun

Start off on the edge with one of your buttons and then just keep building up the pattern until you have covered as much of the lampshade as you wish.

There are so many options for this idea - you could copy what they have done in this image and just go a bit crazy with colours or you can pick a couple and make more of a patterned effect.

I'm definitely going to give this one a go and I'll love to see any of your attempts as well so let me know if you try it out!

I'll be back xx

About This Blog

About This Blog
A blog for fun and unusual Craft tutorials This year I will be learning a new craft every month - if there is a craft you would like to learn, let me know

Search This Blog

Featured Post Via Labels

Instagram Photo Gallery