Sunday 25 August 2013

Lights, Camera, Action...

I've had fun with the upcycle theme this week so I thought I would merge the last post of this week with next week's theme of Lighting!

Vintage Camera Light


I love vintage cameras, especially the kind you see in the movies used by journalist with the massive flash bulbs. I picked this one up on ebay and it's called a Brownie Hawkeye if you want to make one the same but I'm sure you could use most vintage camera's and get an amazing effect every time.

What you'll need
  • Vintage Camera
  • light fitting
  • wire
  • plug
  • wire cap (for earth wire if your light fitting is plastic)
  • glue gun
  • Dremel with a drill piece for cutting plastic
  • Protective gear (minimum requirements - goggles and mask)


Step 1 - Dismantle the Flash

Start by separating the flash from the camera and taking it apart, removing any metal pieces from the plastic so it's easier to cut. My flash was easily separated in two by removing a screw but if yours isn't and you want to hide the cable for the light then you will need to cut it in half.


Step 2 - Suit Up

The next part involves drilling plastic so make sure you have on goggles and a mask so you don't inhale any harmful fumes. Also it's very messy so clear anything that you don't want covered in plastic shavings out the way


Step 3 - Drill holes for the light fitting

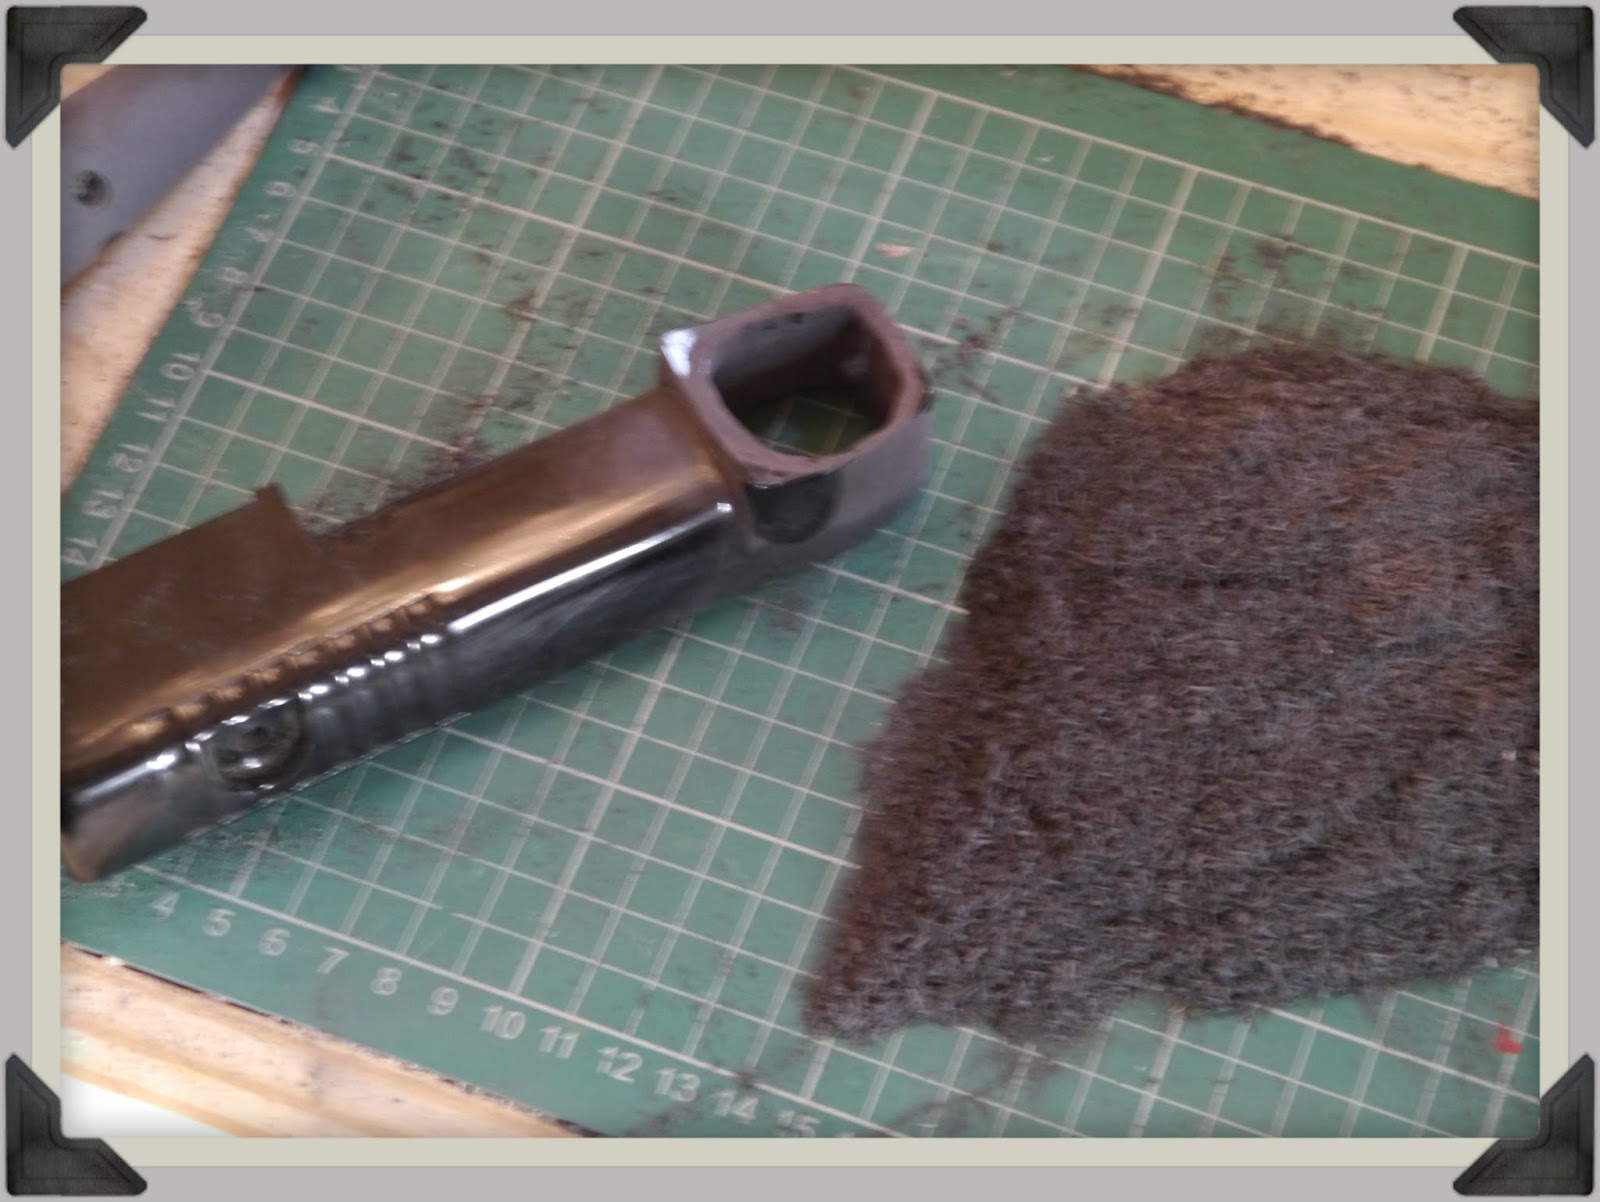
You'll then need to cut holes in the flash casing so that the light fitting can be inserted. I used my boyfriends dremel - I'm not sure what the drill piece is called but here is a picture of it.

I cut a larger hole in the silver casing until the metal piece of the light fitting could fit through

Then I cut a hole in the bottom of the back part of the flash casing and enlarged the hole on the front at the top as much as I could without touching the edges


I also had to trim down the light fitting as the middle rim made it too large for the flash casing.


By the time you are finished you should have something that looks like the image below


Step 4 - Insert your light fitting

BE CAREFUL WHEN WIRING THE LIGHT! 
This part is very dangerous, if you wire the light incorrectly, then you could electrocute yourself so please Google how to do this before you start.

I took my piece of wire and striped it back as required. I then hooked it up to the light fitting and put a wire cap on the earth wire. 
Note: you only need to connect the earth wire to the fitting if it is metal. My fitting is plastic so I just capped it off - do NOT leave any loose wires hanging without capping them.

I then put the light fitting through the front of the flash casing from the inside and then put the silver lamp shade on the front, making sure that the light fitting is far enough out of the shade that you can still put a bulb in and out of the fitting. Once it's all in place, glue the lamp shade to the flash casing. The holes made for the light fitting are only large enough to allow the fitting to squeeze through so that it stays in place and doesn't wobble around.

I then put the other end of the wire through the hole I made in the bottom of the back part of the casing and then wired up the plug. This is an important step to do before adding the plug, otherwise you won't be able to close up the front and back of the flash casing.

I added some glue to the front edge of the casing and then placed the back piece back on so that everything is intact again.

Taking one of the original screws, I screwed the flash back into the camera so it was all in one piece again


Step 5 - And then there was light

All that is left to do is put a bulb in the lamp and switch it on!


If you would like any more help with doing your own Camera Lamp then please get in contact by commenting on this post or emailing me at craftalavista@gmail.com

I'll be back xx


Saturday 24 August 2013

Punks Picnic

Enjoying a day of music and who are better at upcycling than the Punks!!!
Upcycled clothes, hair and skin...finding so much inspiration here!

Friday 23 August 2013

Upcycle with a little help from my friends

This weeks upcycling theme has had me searching high an low, all over the web for some inventive tutorials for you guys. As I was searching a massive grin came across my face every time I found a tutorial that reminded me of one of my loved ones so I'm going to share my favourites with you!

First one is for my awesome sister Kerry. She loves her cats (as do I) so as soon as I saw this tutorial, I started looking into parts so I could make one for her. Once I track some cute suitcases down, you can expect one of these in your house Ker!

Cazza - I can just see pop pop in one of these as well  :)

catTable2


My brothers are mad about their record players! They have vinyls everywhere and are always ready for an open mic night, singing their blues songs and playing guitar. I thought this would be a great table for a record player and crazy simple to make as well so even they can do it!


Loopy Lorna is the name of a lovely little tea room in Edinburgh but it's also the name of my fab mate from Uni. Whenever we find a a new fruit tea we like, we bring it round to the others house and when she moved out of her last flat she offered me a few teapots for my crafting cupboard, knowing that I'd find something to do with them. Well Lorna - your new house with its amazing garden and your teapots inspired me and I went searching for a bird feeder. 

Lorna has a mini wildlife park in her garden which is a means for fun stories every time we meet (especially those mental bunnies) so here is an idea for your garden which made me smile

vintage teacup bird feeder


Last year my gladiator of a mate Tatum, cycled all the way from London to Paris! I know - how impressive is she!!!! When I lived in London we were always working on some new crafty idea for our houses and this one made me think of you hun. I'm sure your lovely fiance won't mind you borrowing one of his wheels...

bicycle wheel clock


When I think of my friend Lucy, two words spring to mind - Dinosaurs & Baking. Could this tutorial be any more perfect!
DIY Dinosaur Serving Dish by Three Little Monkeys Studio


Every year for my boyfriends birthday and Christmas his eyes light up as he knows his Jack Daniels stock will be replenished and before you know it the empty bottles start piling up as we all help him drink it through the festive periods. I will definitely be making this soap dispenser for my kitchen - it's quirky and a great way to recycle those empties...guess what you are all getting for Christmas next year :)

Jack Daniels Soap Dispenser  by Curly Birds


Since I was a wee nipper, my best mate Louise has always been there for me so I was over the moon when last year I could repay the favour and be her bridesmaid.

Louise planned her wedding to a T and it all paid off as it truly was a fabulous event! Her mum was like a crafting superhero and worked tirelessly to make her little girls day memorable and one of my favourite memories was the wedding breakfast. I remember walking into the room and being wowed by the amount of effort she had gone to and how beautiful the table looked. I especially loved the tissue pom poms she made and these coffee filter ones reminded me of them


Fireman Neil is my geek mate. Be it music, computer games or the new Game of Thrones season - he's round on our couch in a flash to geek out and unwind after a hard days work, so when I saw this picture I thought of you...

Skyrim Keep Calm And FUS RO DAH Upcycled by InsomniaStudios


An NHS trolley upcycled with vintage magazines - this could only be for my brain box bestie who has worked up and down the country to help keep improving the health care we all receive. I can just imagine Catriona and her gorgeous girls baking on top of this.


You know that friend who is always there ready with a glass of wine when you have had a horrible day, well mine loooooves giraffes! This is an awesome tutorial for an awesome friend and I can't wait to keep collecting those corks with you Corinne.


Last but far from least a tutorial that reminds me of my best friend in the world - my mum!

When I was little my mum was always making things for or with me and I owe my crafting skills to all the encouragement she has given me over the years. From letting me paint my own mural on our playroom wall to cutting up her own wedding dress so I could play dress up with my friends, my mum had an endless supply of ideas and activities which meant life was never a dull place. 

I remember one of my primary school friends was leaving for OZ and was having a woolly jumper party. Everyone turned up in their best jumper but I stood out from the crowd in my brand new dress - made from one of my mums jumpers. This one reminded me of you mum, love you a million times over xxxx


I've had the lovely walk down memory lane as I was looking through these tutorials and I hope you have enjoyed a little insight into my life and the amazing people I have around me. Of course, I couldn't mention everyone I love, but don't worry - I'll be blogging about you one day, you can count on that!

My plan was to inspire you with the people who inspire me - so get searching on the web for tutorials that remind you of your loved ones and make them something really special this year.

I'll be back xxx


Wednesday 21 August 2013

Blackboard Photo Frame

As promised yesterday, here's my tutorial on how to make your very own Blackboard Photo Frame.


I love blackboards! Maybe it's because I work in technology, but there is just something really satisfying about leaving someone a blackboard message, rather than sending them a text. I'd seen the idea of using a photo / mirror frame with a blackboard in a local pub and couldn't wait to get home to try it out.


Before you can start, you'll need

  • A frame which can be any size an shape you want
  • a MDF board cut to the size of your frame (some B&Q's etc will cut it for you) 
  • blackboard paint (again I got mine from B&Q)
  • glue gun
  • hammer and nails


Step 1
Paint one side of your MDF with the blackboard paint, giving it a couple of coats and leave to dry

Tip: whilst this is drying - if you also want to change the colour of your frame then it's a good idea to paint them at the same time so your drying time isn't doubled!

Step 2
Put glue round the back of your frame - if there is a grove where the glass would have fitted in, then you can glue this part so that the board sits flush in the frame

Step 3
I was worried about hanging the blackboard as it's something that we would be drawing on all the time so I didn't want it to be wobbly. I ended up holding it up on the wall and my boyfriend hammering a nail into each corner of the MDF (inside the frame). This means it doesn't move at all but if you are worried about putting that many holes in your wall you could screw in picture hooks and string it up like a normal frame but it won't be as sturdy.

Then you are good to go - it's really as simple as that!

Happy Crafting xx


Tuesday 20 August 2013

Upcycling - Start with something simple


About to through out that old piece of furniture or sick of your old clothes, well STOP and think about all your upcycling possibilities before you do!!!

Upcycling is a great way to vamp up those unwanted items and you feel extra proud of not only your creative skills but also doing your part to help the environment by recycling. Some people fine this quite a daunting term but it doesn't need to be complicated. Today we are going to start of with something really easy but can totally change a room...Picture Frame Artwork

For a while we have thought our livingroom wall was quite plain and we were looking for a large piece of artwork to fill in all that blank space but everything we loved was quite expensive. I loveeee photographs so we decided to come up with something using all the photo frames we had lying around as they had started to make the house look a bit cluttered (not going to lie - we had to by a few extras as well) and the end result looks like this:


We started buy painting all the photo frames black so they matched (I found for the more detailed vintage style frames it was easier to spray paint to get in all the nooks and crannies) and then filled them with a mixture of black and white photos and our favourite home made pieces of artworks our friends have made us.

Using the mounted television as a central point we started putting the frames on the wall, taking turns at stepping back to make sure it fitted well with all the others we had already put up. I love the finish effect as it's a piece of art that is personalised to us and our loved ones - which is priceless!

REMEMBER to check the walls for cables etc before hammering so many nails

Or if photos aren't your thing - you could pick up wall paper samples from your local DIY store and place them in frames to make your own piece of art

collage_frame.jpg


Here are a range of tutorials other people have made with their own take on this idea


Earrings frame | storage | traditional | PHOTO GALLERY | Style at Home | Housetohome


I've also made my own blackboard photo frame which I'll be putting up a tutorial for later in the week


Well I hope this has inspired you to look around your house and see what you could transform into something new. Please comment on this page or send me and email at craftalavista@gmail.com if you would like ideas on transforming a specific item and we will see what we can come up with!

Happy Crafting xxxx

Sunday 18 August 2013

Felt Rose Ring

So I started off this week with a paper rose necklace and I'm ending it with a ring you could accessorize it with, courtesy of angelichigo!

This ring is quick and simple - just like this post :)

check it out peeps!!


Saturday 17 August 2013

Edinburgh Contemporary Crafts


Today my boyfriend and I battled the festival crowds on our way to a lino carving course with Edinburgh Contemporary Crafts on Blair St.

Lino carving?!? I hear you say...


Well it's a way to make print stamps that you can use again and again for cards, bags, clothes and more!
Our instructors were great - we were greeted with a warm welcome as we were shown to our seats and then they supplied us with the tools we needed to get started. They gave us paper to practice on and showed us how to carve the lino, making sure you know to carve the background so that you are left with your stamp image,  ready for painting. They also have a range of pattern books for you to look through and get inspiration.

You are then left to your own devices and there is no rush to get finished. They were open from 1pm - 9pm and you can bring your own booze so great for a girly day out. The girls were still about to give you a helping hand if you needed it.

Once you are finished making your printing stamp, you go over to the painting section.  There are a range of coloured paints to use and a choice of white or brown card to print on. We had fun experimenting with the different colours and even tried out some layering.
It was great to see how different everyone's designs were and you get to take everything you have made home with you - I'll definitely be checking out what other courses they have on!


Check out www.edinburghcontemporarycrafts.co.uk for more info


Wednesday 14 August 2013

Bacon and roses

Bacon and roses, not normally two words you see together but this tutorial managed to do just that!

If you're stuck for that perfect romantic meal for your man, then this has to be the starter

Check out Ferochia's fab tutorial and please let me know if you give it a go!


Sunday 11 August 2013

Paper Rose Necklace & Hair Clip

I was at an amazing wedding last week and I wanted a statement piece to go with my dress, as it was quite plain.

I had previously seen lots of tutorials on paper flowers that I was dying to try out and this seemed like a perfect opportunity so I gave it a shot and it transformed into this beautiful necklace and hair clip.

Thankfully it didn't rain, it's definitely a necklace for warmer climates!

Click on the image to see my first tutorial


A new begining...

Crafta La Vista has been my baby for the last couple of years and today I've decided to take it in a new direction.

I started a facebook page in 2012 to sell sock animals after my amazing boyfriend gave me a book on how to make them for valentines day but over time my ideas developed and craft projects exploded all over my flat.

I've tried to rein it back in and focus on one project to sell but the thing I love doing most is showing you guys how to make fun and unusual pieces, as well as finding other amazing tutorials from all you crafty people out there.

I'll still have a section on my facebook page for items I'm selling, but it will no longer be the main focus of my time. You'll also start to see more kits, like "Make Your Own Jam Jar Candle Holder" appear on my page over the next year so keep your eyes pealed! Other items such as sock people portraits are available on request, please email craftalavista@gmail.com for more information.

So hopefully you love the new direction and will continue to support my work! You guys have been fabulous and have made me love what I do - THANK YOU!

Nicole aka Crafta La Vista

About This Blog

About This Blog
A blog for fun and unusual Craft tutorials This year I will be learning a new craft every month - if there is a craft you would like to learn, let me know

Search This Blog

Featured Post Via Labels

Instagram Photo Gallery