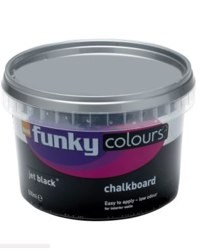
I love blackboards! Maybe it's because I work in technology, but there is just something really satisfying about leaving someone a blackboard message, rather than sending them a text. I'd seen the idea of using a photo / mirror frame with a blackboard in a local pub and couldn't wait to get home to try it out.
Before you can start, you'll need
- A frame which can be any size an shape you want
- a MDF board cut to the size of your frame (some B&Q's etc will cut it for you)
- blackboard paint (again I got mine from B&Q)
- glue gun
- hammer and nails
Step 1
Paint one side of your MDF with the blackboard paint, giving it a couple of coats and leave to dry
Tip: whilst this is drying - if you also want to change the colour of your frame then it's a good idea to paint them at the same time so your drying time isn't doubled!
Step 2
Put glue round the back of your frame - if there is a grove where the glass would have fitted in, then you can glue this part so that the board sits flush in the frame
Step 3
I was worried about hanging the blackboard as it's something that we would be drawing on all the time so I didn't want it to be wobbly. I ended up holding it up on the wall and my boyfriend hammering a nail into each corner of the MDF (inside the frame). This means it doesn't move at all but if you are worried about putting that many holes in your wall you could screw in picture hooks and string it up like a normal frame but it won't be as sturdy.
Then you are good to go - it's really as simple as that!
Happy Crafting xx


No comments:
Post a Comment